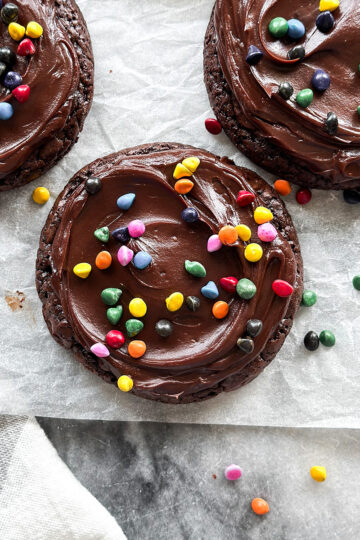
Chocolate and hazelnut is a match made in heaven, so why not decorate chocolate hazelnut cut out cookies for Valentine’s Day? They’re delicious with a soft texture and covered in a fudgy cocoa royal icing. They’re even better when paired with my strawberry sugar cookies with strawberry royal icing. Because chocolate and strawberry, also a match made in heaven.

why you’ll love chocolate hazelnut sugar cookies with cocoa royal icing
- These chocolate hazelnut sugar cookies are rich and brownie-like, which is kind of a hard texture to achieve in a chocolate roll out dough that doesn’t have a lot of spread!
- The flavor of the fudgy cocoa royal icing is incredible and paired perfectly with the chocolatey sugar cookies.
- The dough is easy to make and comes together quickly. If you’re in a pinch, the chill time can be sped up with the freezer!

ingredients in chocolate hazelnut sugar cookies with cocoa royal icing
- unsalted butter– Make sure your butter is room temperature for the best results. If all you have is salted butter, it’s totally fine!
- granulated sugar– for sweetness and to make a soft texture
- Diamond Crystal kosher salt– This is the best type of salt for baking and cooking, so I totally recommend grabbing a box here. It will last a while. If all you have is regular table salt, use only half the amount of salt the recipe calls for. In this case, you would use ½ teaspoon of regular table salt rather than 1 teaspoon of Diamond Crystal kosher salt.
- egg
- vanilla– I use vanilla bean paste because the flavor is more intense and generally better, but vanilla extract is just fine here.
- all purpose flour
- Dutch cocoa powder– Make sure to use Dutch cocoa powder rather than natural cocoa powder. There is a big difference in flavor, and Dutch cocoa is responsible for the intense chocolatey-ness in this cookie.
- hazelnut flour– This is just ground hazelnuts. I get mine from Nuts.com and it’s incredible. It lasts forever, too.
- baking powder– for a bit of lift
- royal icing– get the recipe here
supplies needed to make chocolate hazelnut sugar cookies with cocoa royal icing
- scale– to measure the flour, sugar, and strawberries
- hand mixer or stand mixer
- spatula– to scrape the sides of the bowl
- fine mesh sieve– Don’t hate me for this, but you’re really going to want to sift the cocoa powder. It just clumps unapologetically.
- parchment paper– for rolling the dough and baking the cookies
- rolling pin with a guide for ¼″
- cookie cutters
how to make chocolate hazelnut sugar cookies with cocoa royal icing
To a mixing bowl, add the butter, sugar, and salt. Mix on medium-low speed until the mixture is “creamed”, which means lighter and a bit fluffy. Since this is a roll out dough, you don’t need to mix it for several minutes until it is very fluffy like you would for a cake. Look for a completely combined mixture with no lumps of butter or clumps of sugar.
Add the egg and vanilla and mix until emulsified. The mixture will be smooth, thick, and a bit shiny. All at once, add the flour, cocoa powder, hazelnut flour, and baking powder. Mix on low until the dry ingredients are nearly combined and there are no dry, floury spots. Be careful not to over mix the dough!
Drop the dough onto a piece of lightly floured parchment paper. Sprinkle a bit more flour on top of the dough lump before covering it with another piece of parchment paper. Use a ¼″ guided rolling pin to roll out the dough.
Refrigerate the dough for at least a half an hour to two hours to chill the butter in the dough. This makes it so much more workable and helps prevent spread in the final cookies. If you’d like to work ahead of time, leave the dough (well wrapped) in the fridge for up to three days. If you’re in a rush, freeze the dough for ten to fifteen minutes.
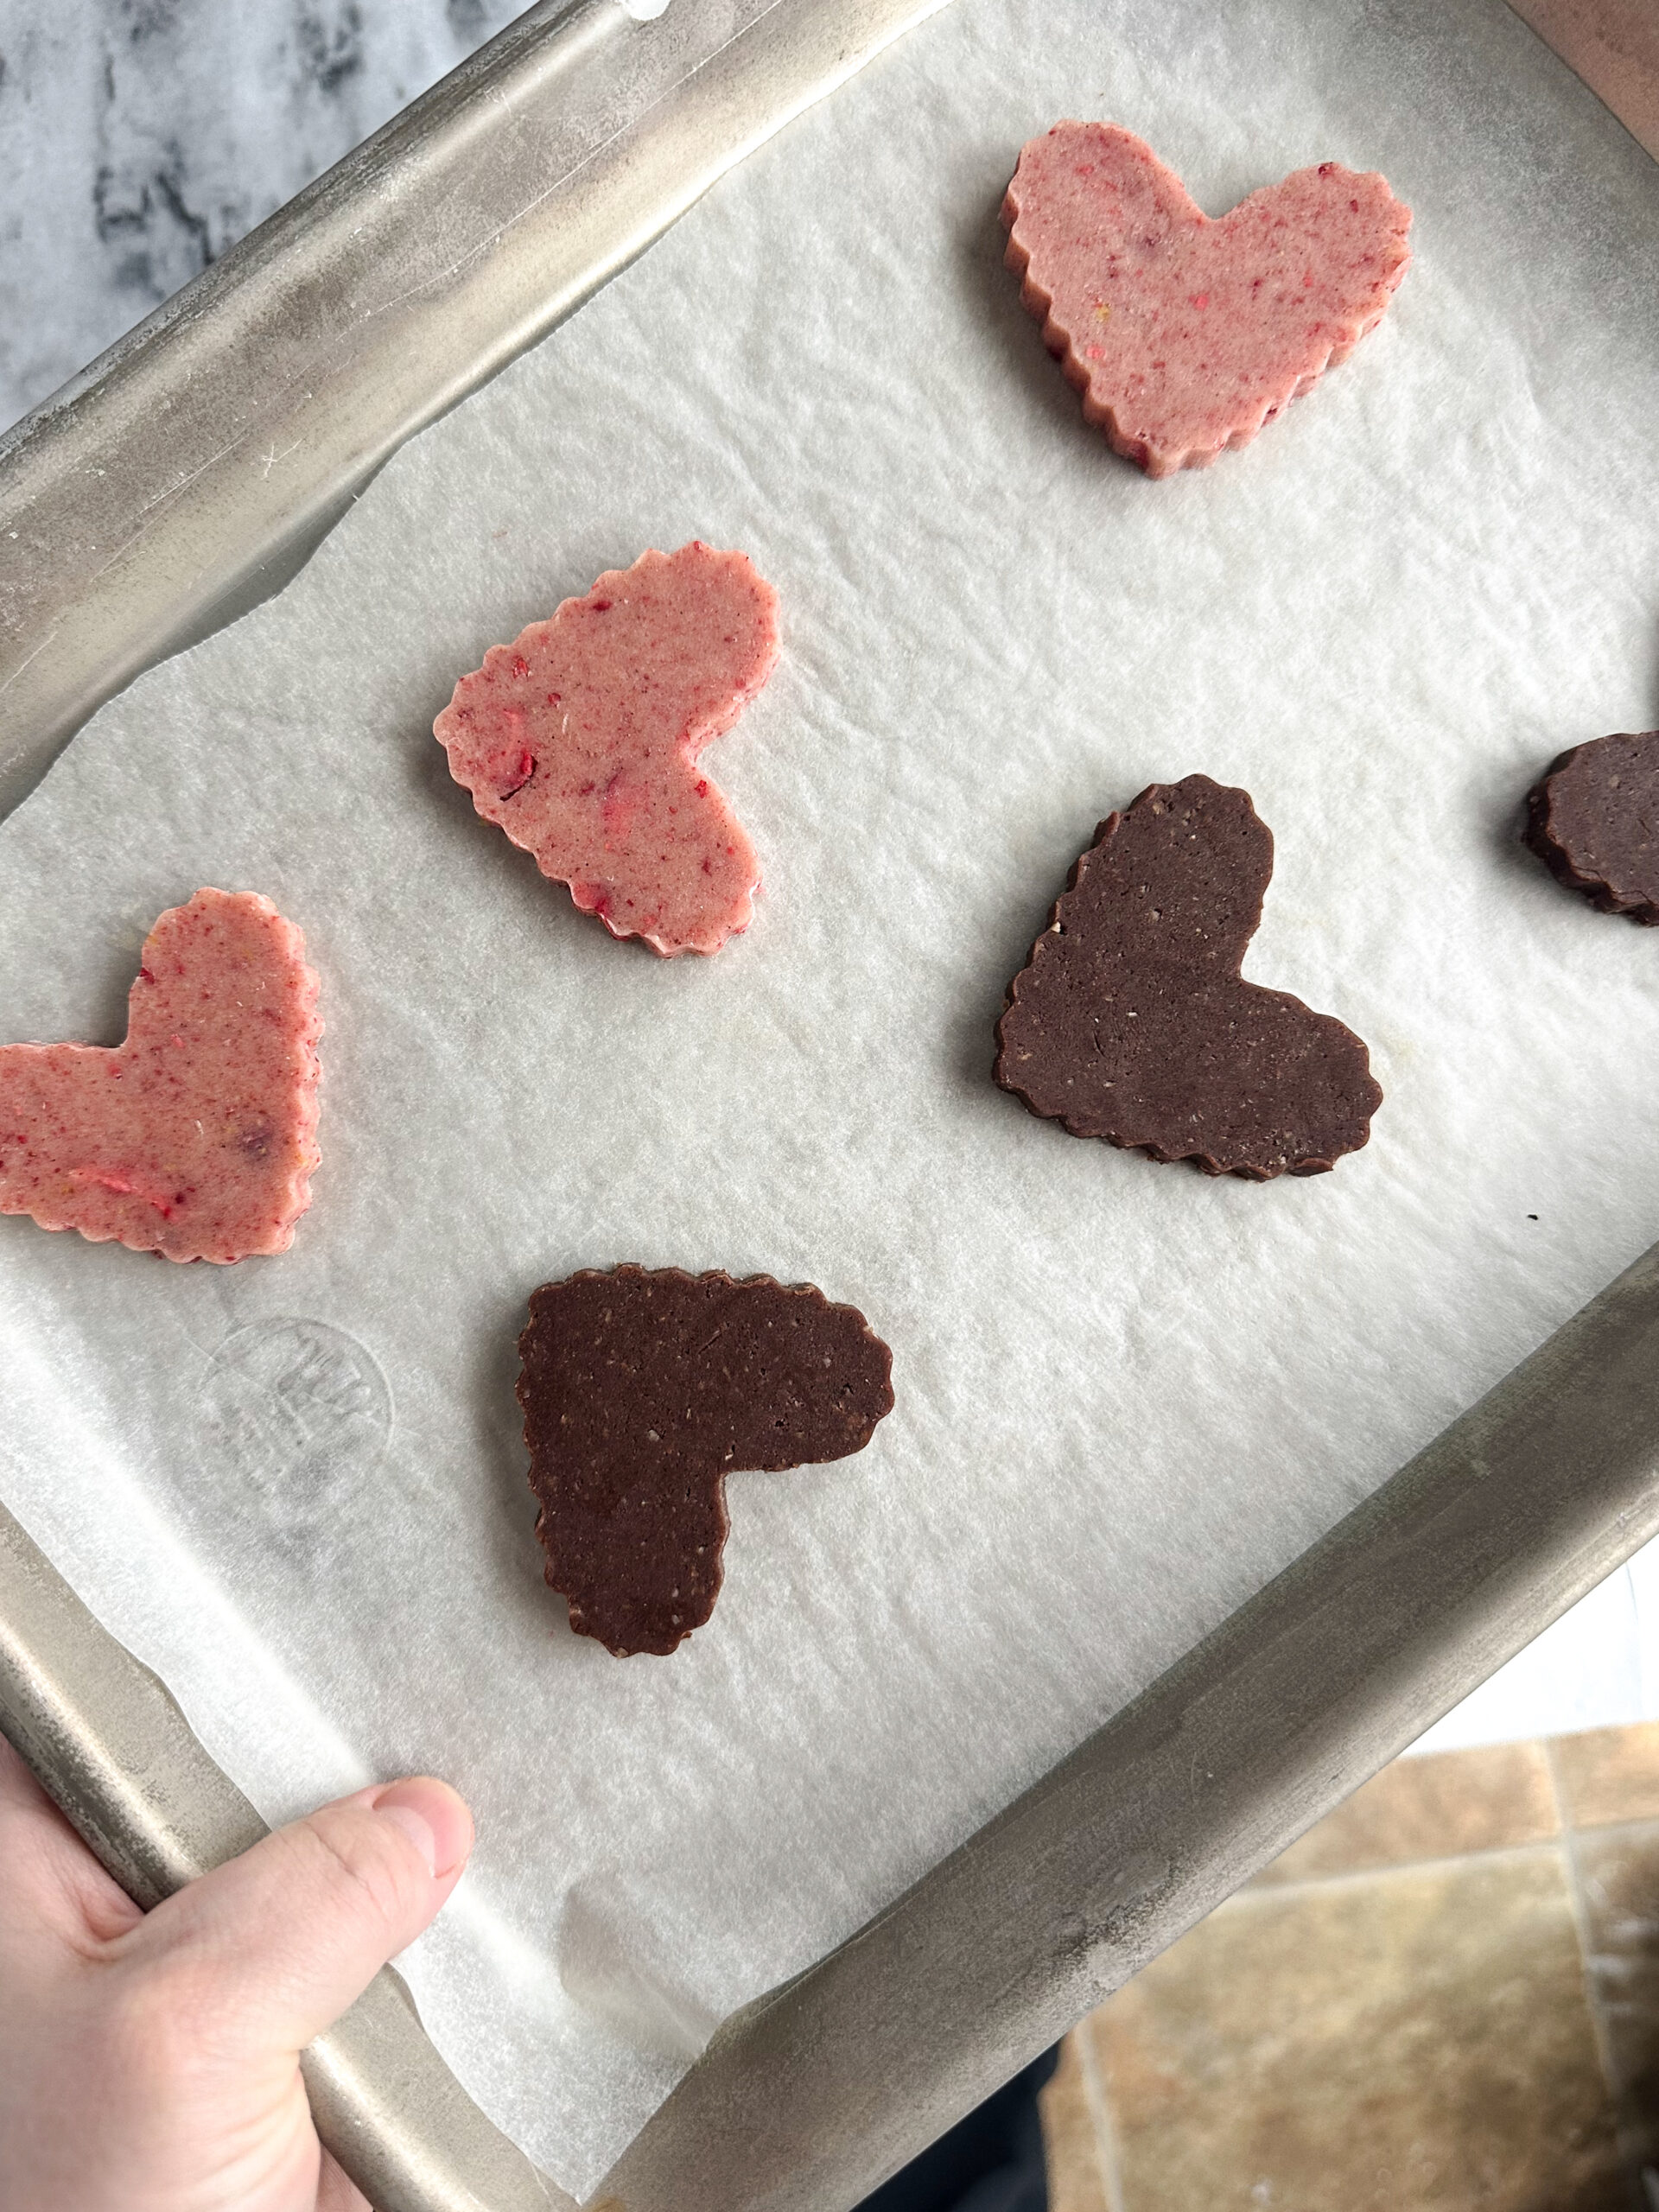
Once the dough has chilled, and you’re ready to start cutting cookies, preheat the oven to 375 F. Grab your cookie cutters and cut shapes from the dough, dipping the cutters in flour if they are sticking to the dough. Place the cut shapes on a parchment lined baking sheet and pop in the freezer for five minutes before baking. This helps the cookies retain their shape. Don’t skip this!
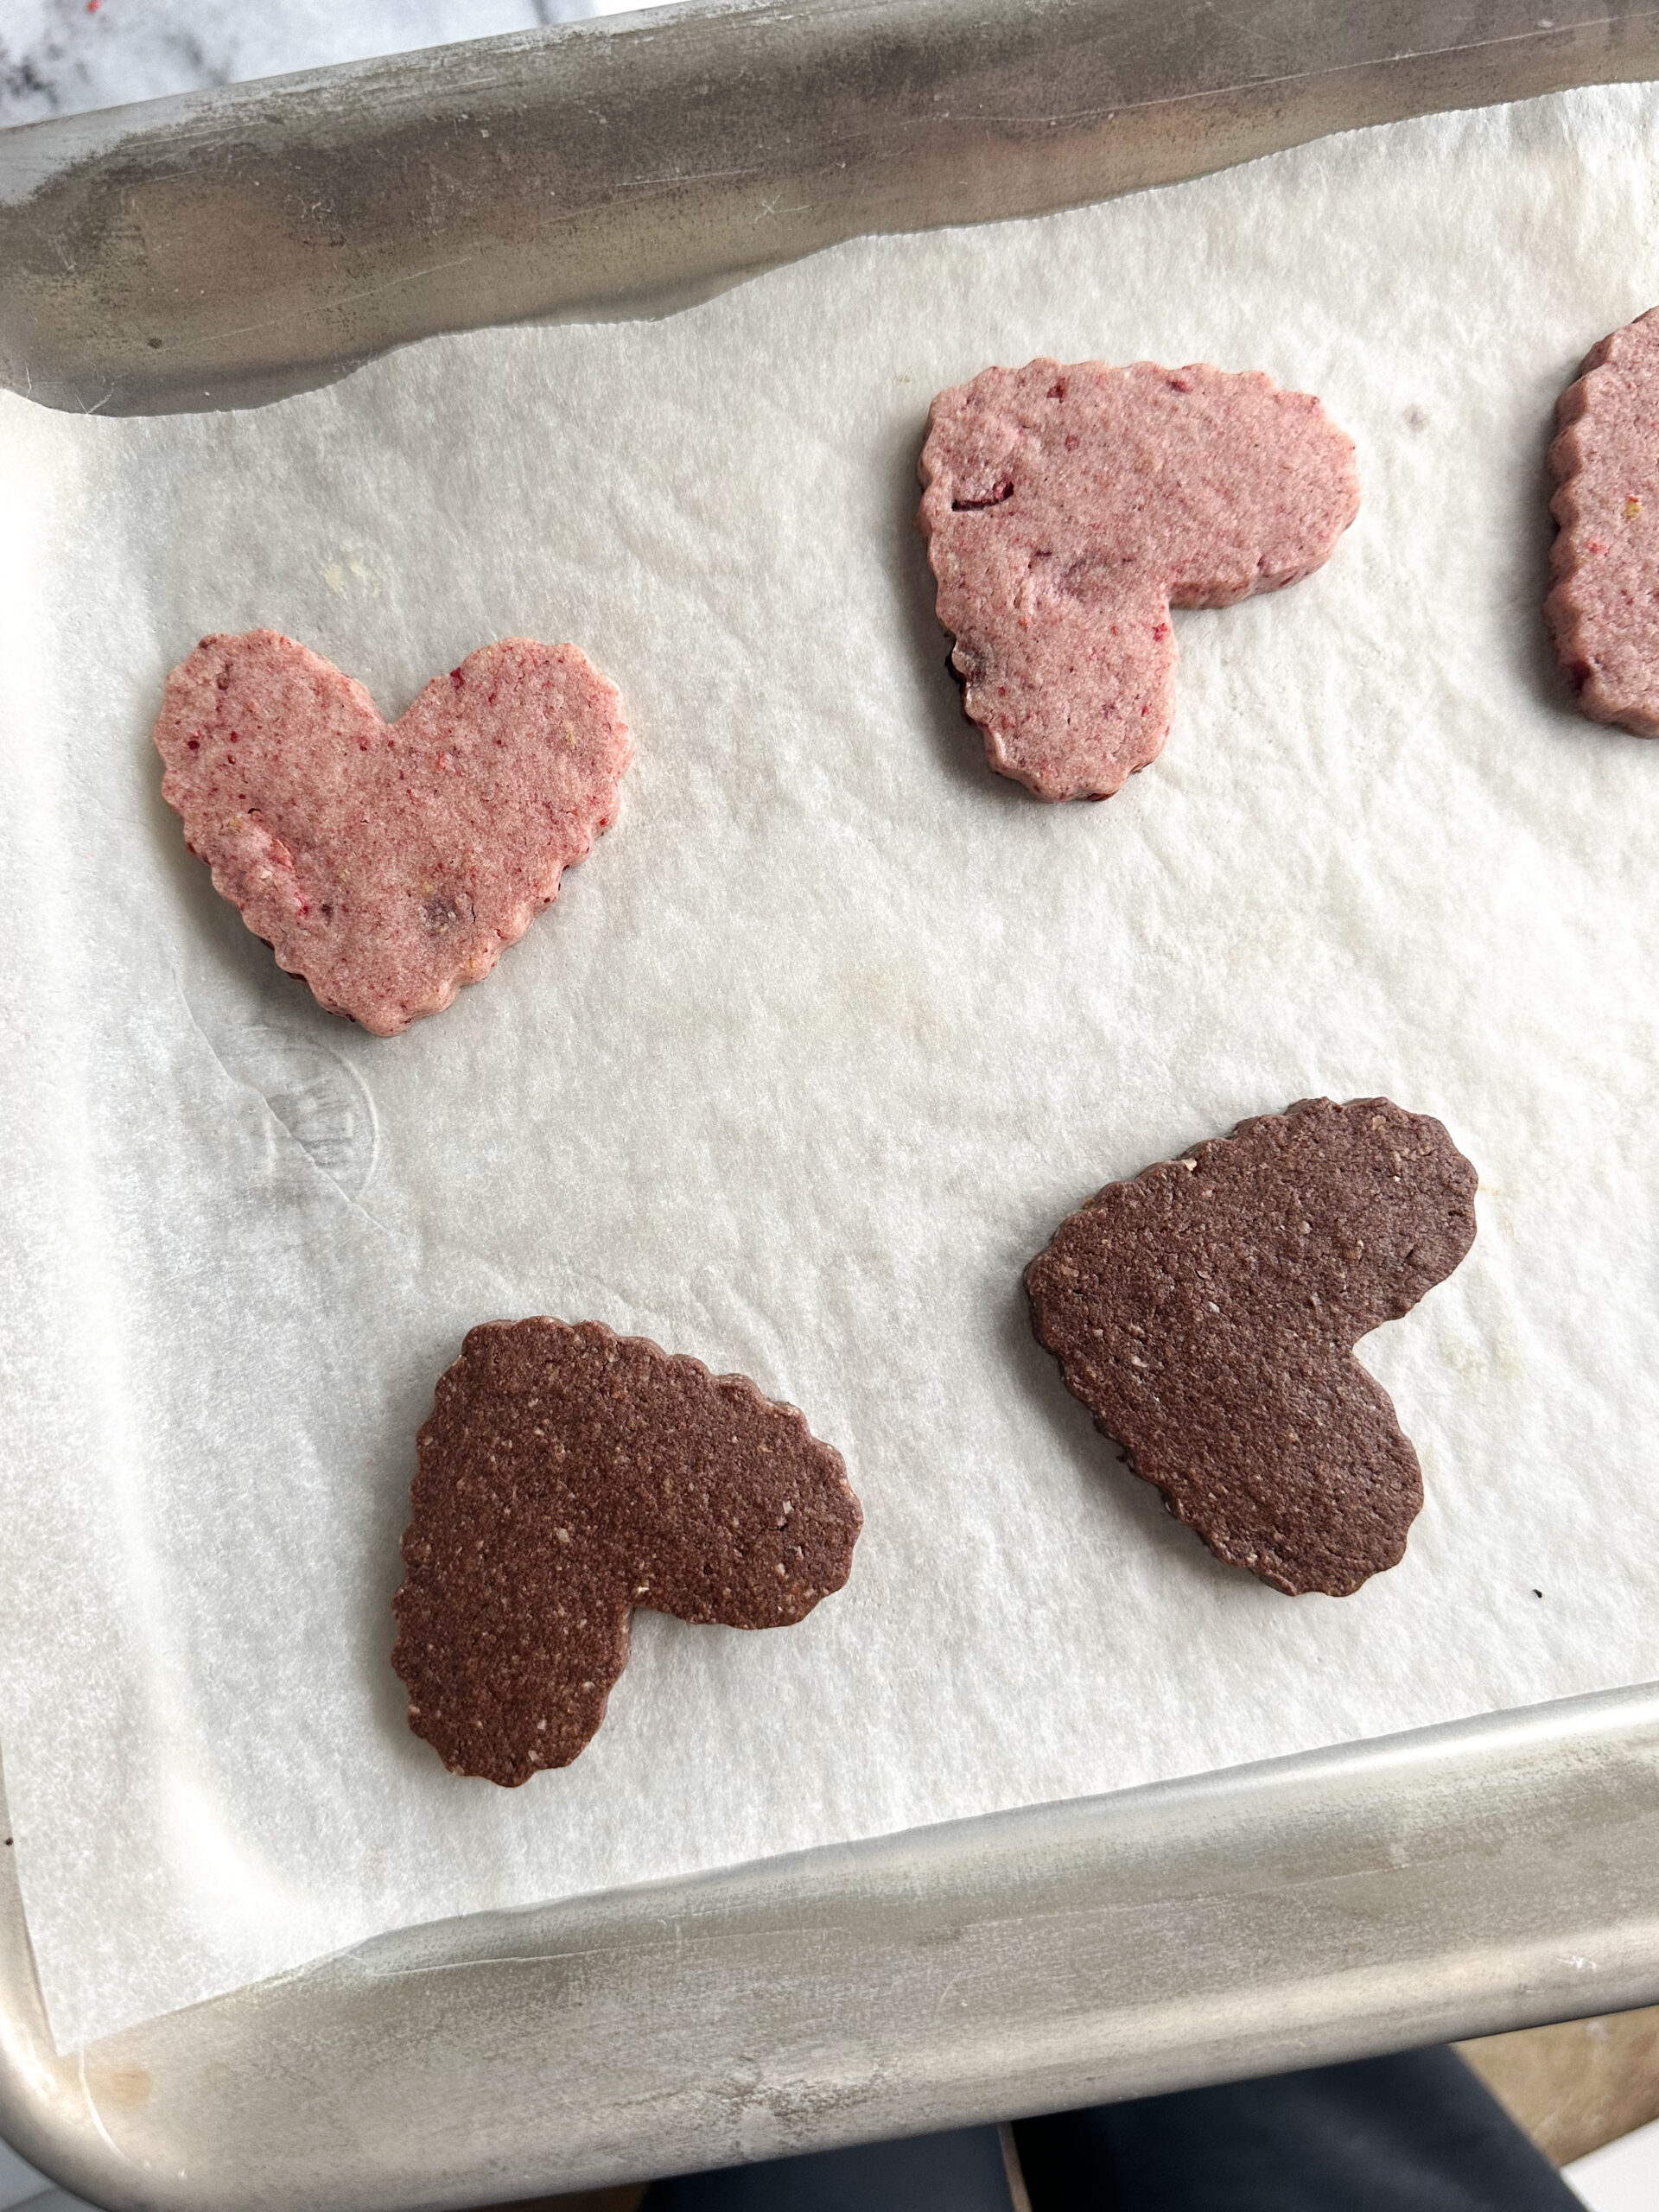
Bake the cookies for 6-8 minutes for smaller cookies, and 8-10 minutes for larger cookies. Keep an eye on them, and bake them until the tops are no longer shiny. Don’t over bake them, or they won’t be soft.
Once they’re done baking, let them cool on the cookie sheet for a few minutes before transferring them to a wire rack to cool completely. If you move them too soon when they’re piping hot, they could break easily.
Re-roll the dough scraps, preferably up to two times. If the dough is very soft after rolling, pop the dough in the freezer for five minutes to chill before cutting cookies again.
how to make fudgy cocoa royal icing
You are going to LOVE this fudgy cocoa royal icing. It tastes amazing, like a fudgesicle. Start by making a batch of thick salted vanilla bean royal icing. My recipe makes about 6 cups of icing. Determine how much of it you’d like to turn into chocolate icing, and then follow this basic ratio, and adjusting as needed. Weigh eight ounces (one cup) of icing into a small bowl. To a separate bowl, add 1-2 tablespoon (I do 2 Tbsp, which is the max amount) of Dutch process cocoa powder and a splash of hot water. Mix it into a thick paste, adding hot water as needed. Don’t thin it out too much. It should be very thick. Add it to the bowl of icing and mix it until it is fully combined. Thin the icing out to your desired consistency and use as normal.
This icing will have a bit of a gluey, stretchy texture due to the fat in cocoa powder, but it isn’t difficult to use. You may just notice a slight change in texture while piping and the way the icing dries. Feel free to adjust the amount of cocoa powder to your liking based on color and taste.
To recap, the ratio is one cup of icing to 1-2 tablespoon of Dutch process cocoa powder. I prefer a very rich chocolatey flavor, so I use 2 Tbsp. If you prefer a more light, chocolate milk flavor, then use 1 Tbsp. (Using a lower amount of cocoa powder will help the icing dry better if you’re concerned about that. When using the larger amount of cocoa powder, the icing will dry, but under the surface the icing will still be moist. It’s a great eating texture.)
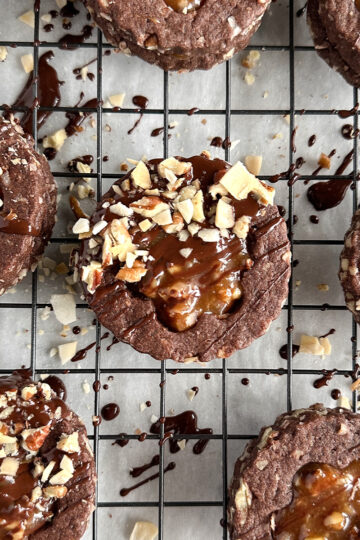
how to decorate chocolate hazelnut cookies with cocoa royal icing
This is such a simple decorating technique, but it is also so effective and pretty. Start by piping an outline with a thicker consistency of royal icing and flooding with a looser consistency of icing. Smooth the icing around the surface of the cookie with a scribe tool, pushing the flood icing to meet the border icing. Using a different color of flood icing, like white vanilla or brown chocolate, pipe dots all around the edge of the cookie. Use your scribe tool to gently poke into icing, pulling the scribe tool through each of the dots. This creates a continuous heart pattern in a really simple way.
success tips for making chocolate hazelnut sugar cookies with cocoa royal icing
- ‘Mise en place’ is a French phrase with the idea of putting everything in its place before beginning to make a recipe. It helps everything to go smoothly and eliminates so much possible stress. Getting all of your supplies and ingredients together before ever starting the recipe will help tremendously.
- Weigh your ingredients, particularly the flour. It is the most important measurement in this recipe to weigh. Flour can be off in volume measurements by up to 30g, which is a quarter cup! Having incorrect flour measurements can cause your cookies to spread too much or, alternatively, be dry and crumbly. Weighing your ingredients makes everything so much easier, as you don’t have to wash all the measuring cups at the end. However, I do not use the scale to weigh out teaspoon or tablespoon measurements for things like baking powder, salt, vanilla, or cornstarch, for example.
- Don’t over bake these cookies. They are meant to be on the softer side. Bake them just until the tops are no longer shiny.
- Don’t skip the chill time. Even a little bit is better than none, and a short time in the freezer is a good way to chill the dough fast.
- Buy pre-ground hazelnuts rather than trying to do it yourself with raw hazelnuts. Trust me, it is not worth it.
- Use Dutch process cocoa powder, not natural cocoa powder. There is a big difference in taste, and the Dutch process cocoa will make these cookies rich and fudgy tasting.
chocolate hazelnut sugar cookies with cocoa royal icing

Chocolate and hazelnut is a match made in heaven, so why not decorate chocolate hazelnut cut out cookies for Valentine’s Day? They’re delicious with a fudgy cocoa royal icing.
- Yield: about 2 dozen, depending on the size of the cookies 1x
Ingredients
Chocolate Hazelnut Sugar Cookies
226g (1 cup) unsalted butter, room temperature
150g (¾ cup) granulated sugar
1 tsp Diamond Crystal kosher salt (or ½ tsp regular table salt)
1 whole egg, large
2 tsp vanilla bean paste or extract
270g (2 ¼ cups) all purpose flour
46g (½ cup) Dutch cocoa powder
90g (1 cup) hazelnut flour
¼ tsp baking powder
Fudgy Cocoa Royal Icing
8 oz. salted vanilla royal icing
1–2 tablespoon Dutch process cocoa powder
hot water
Instructions
To a mixing bowl, add the butter, sugar, and salt. Mix on medium-low speed until the mixture is “creamed”, which means lighter and a bit fluffy. Since this is a roll out dough, you don’t need to mix it for several minutes until it is very fluffy like you would for a cake. Look for a completely combined mixture with no lumps of butter or clumps of sugar.
Add the egg and vanilla and mix until emulsified. The mixture will be smooth, thick, and a bit shiny. All at once, add the flour, cocoa powder, hazelnut flour, and baking powder. Mix on low until the dry ingredients are nearly combined and there are no dry, floury spots. Be careful not to over mix the dough!
Drop the dough onto a piece of lightly floured parchment paper. Sprinkle a bit more flour on top of the dough lump before covering it with another piece of parchment paper. Use a ¼″ guided rolling pin to roll out the dough.
Refrigerate the dough for at least a half an hour to two hours to chill the butter in the dough. This makes it so much more workable and helps prevent spread in the final cookies. If you’d like to work ahead of time, leave the dough (well wrapped) in the fridge for up to three days. If you’re in a rush, freeze the dough for ten to fifteen minutes.
Once the dough has chilled, and you’re ready to start cutting cookies, preheat the oven to 375 F. Grab your cookie cutters and cut shapes from the dough, dipping the cutters in flour if they are sticking to the dough. Place the cut shapes on a parchment lined baking sheet and pop in the freezer for five minutes before baking. This helps the cookies retain their shape. Don’t skip this!
Bake the cookies for 6-8 minutes for smaller cookies, and 8-10 minutes for larger cookies. Keep an eye on them, and bake them until the tops are no longer shiny. Don’t over bake them, or they won’t be soft.
Once they’re done baking, let them cool on the cookie sheet for a few minutes before transferring them to a wire rack to cool completely. If you move them too soon when they’re piping hot, they could break easily.
Re-roll the dough scraps, preferably up to two times. If the dough is very soft after rolling, pop the dough in the freezer for five minutes to chill before cutting cookies again.
While the cookies are baking, make the icing. Weigh eight ounces (one cup) of icing into a small bowl. To the bowl, add 1-2 tablespoon of Dutch cocoa powder (using a fine mesh sieve to sift the cocoa powder into the bowl of icing) and a splash of hot water. Mix it together until it is fully combined and the mixture forms a paste. Add it to the bowl of icing and stir to combine. Thin the icing out to your desired consistency and use as usual.
Notes
-
- ‘Mise en place’ is a French phrase with the idea of putting everything in its place before beginning to make a recipe. It helps everything to go smoothly and eliminates so much possible stress. Getting all of your supplies and ingredients together before ever starting the recipe will help tremendously.
-
- Weigh your ingredients, particularly the flour. It is the most important measurement in this recipe to weigh. Flour can be off in volume measurements by up to 30g, which is a quarter cup! Having incorrect flour measurements can cause your cookies to spread too much or, alternatively, be dry and crumbly. Weighing your ingredients makes everything so much easier, as you don’t have to wash all the measuring cups at the end. However, I do not use the scale to weigh out teaspoon or tablespoon measurements for things like baking powder, salt, vanilla, or cornstarch, for example.
-
- Don’t over bake these cookies. They are meant to be on the softer side. Bake them just until the tops are no longer shiny.
-
- Don’t skip the chill time. Even a little bit is better than none, and a short time in the freezer is a good way to chill the dough fast.
-
- Buy pre-ground hazelnuts rather than trying to do it yourself with raw hazelnuts. Trust me, it is not worth it.
-
- Use Dutch process cocoa powder, not natural cocoa powder. There is a big difference in taste, and the Dutch process cocoa will make these cookies rich and fudgy tasting.