
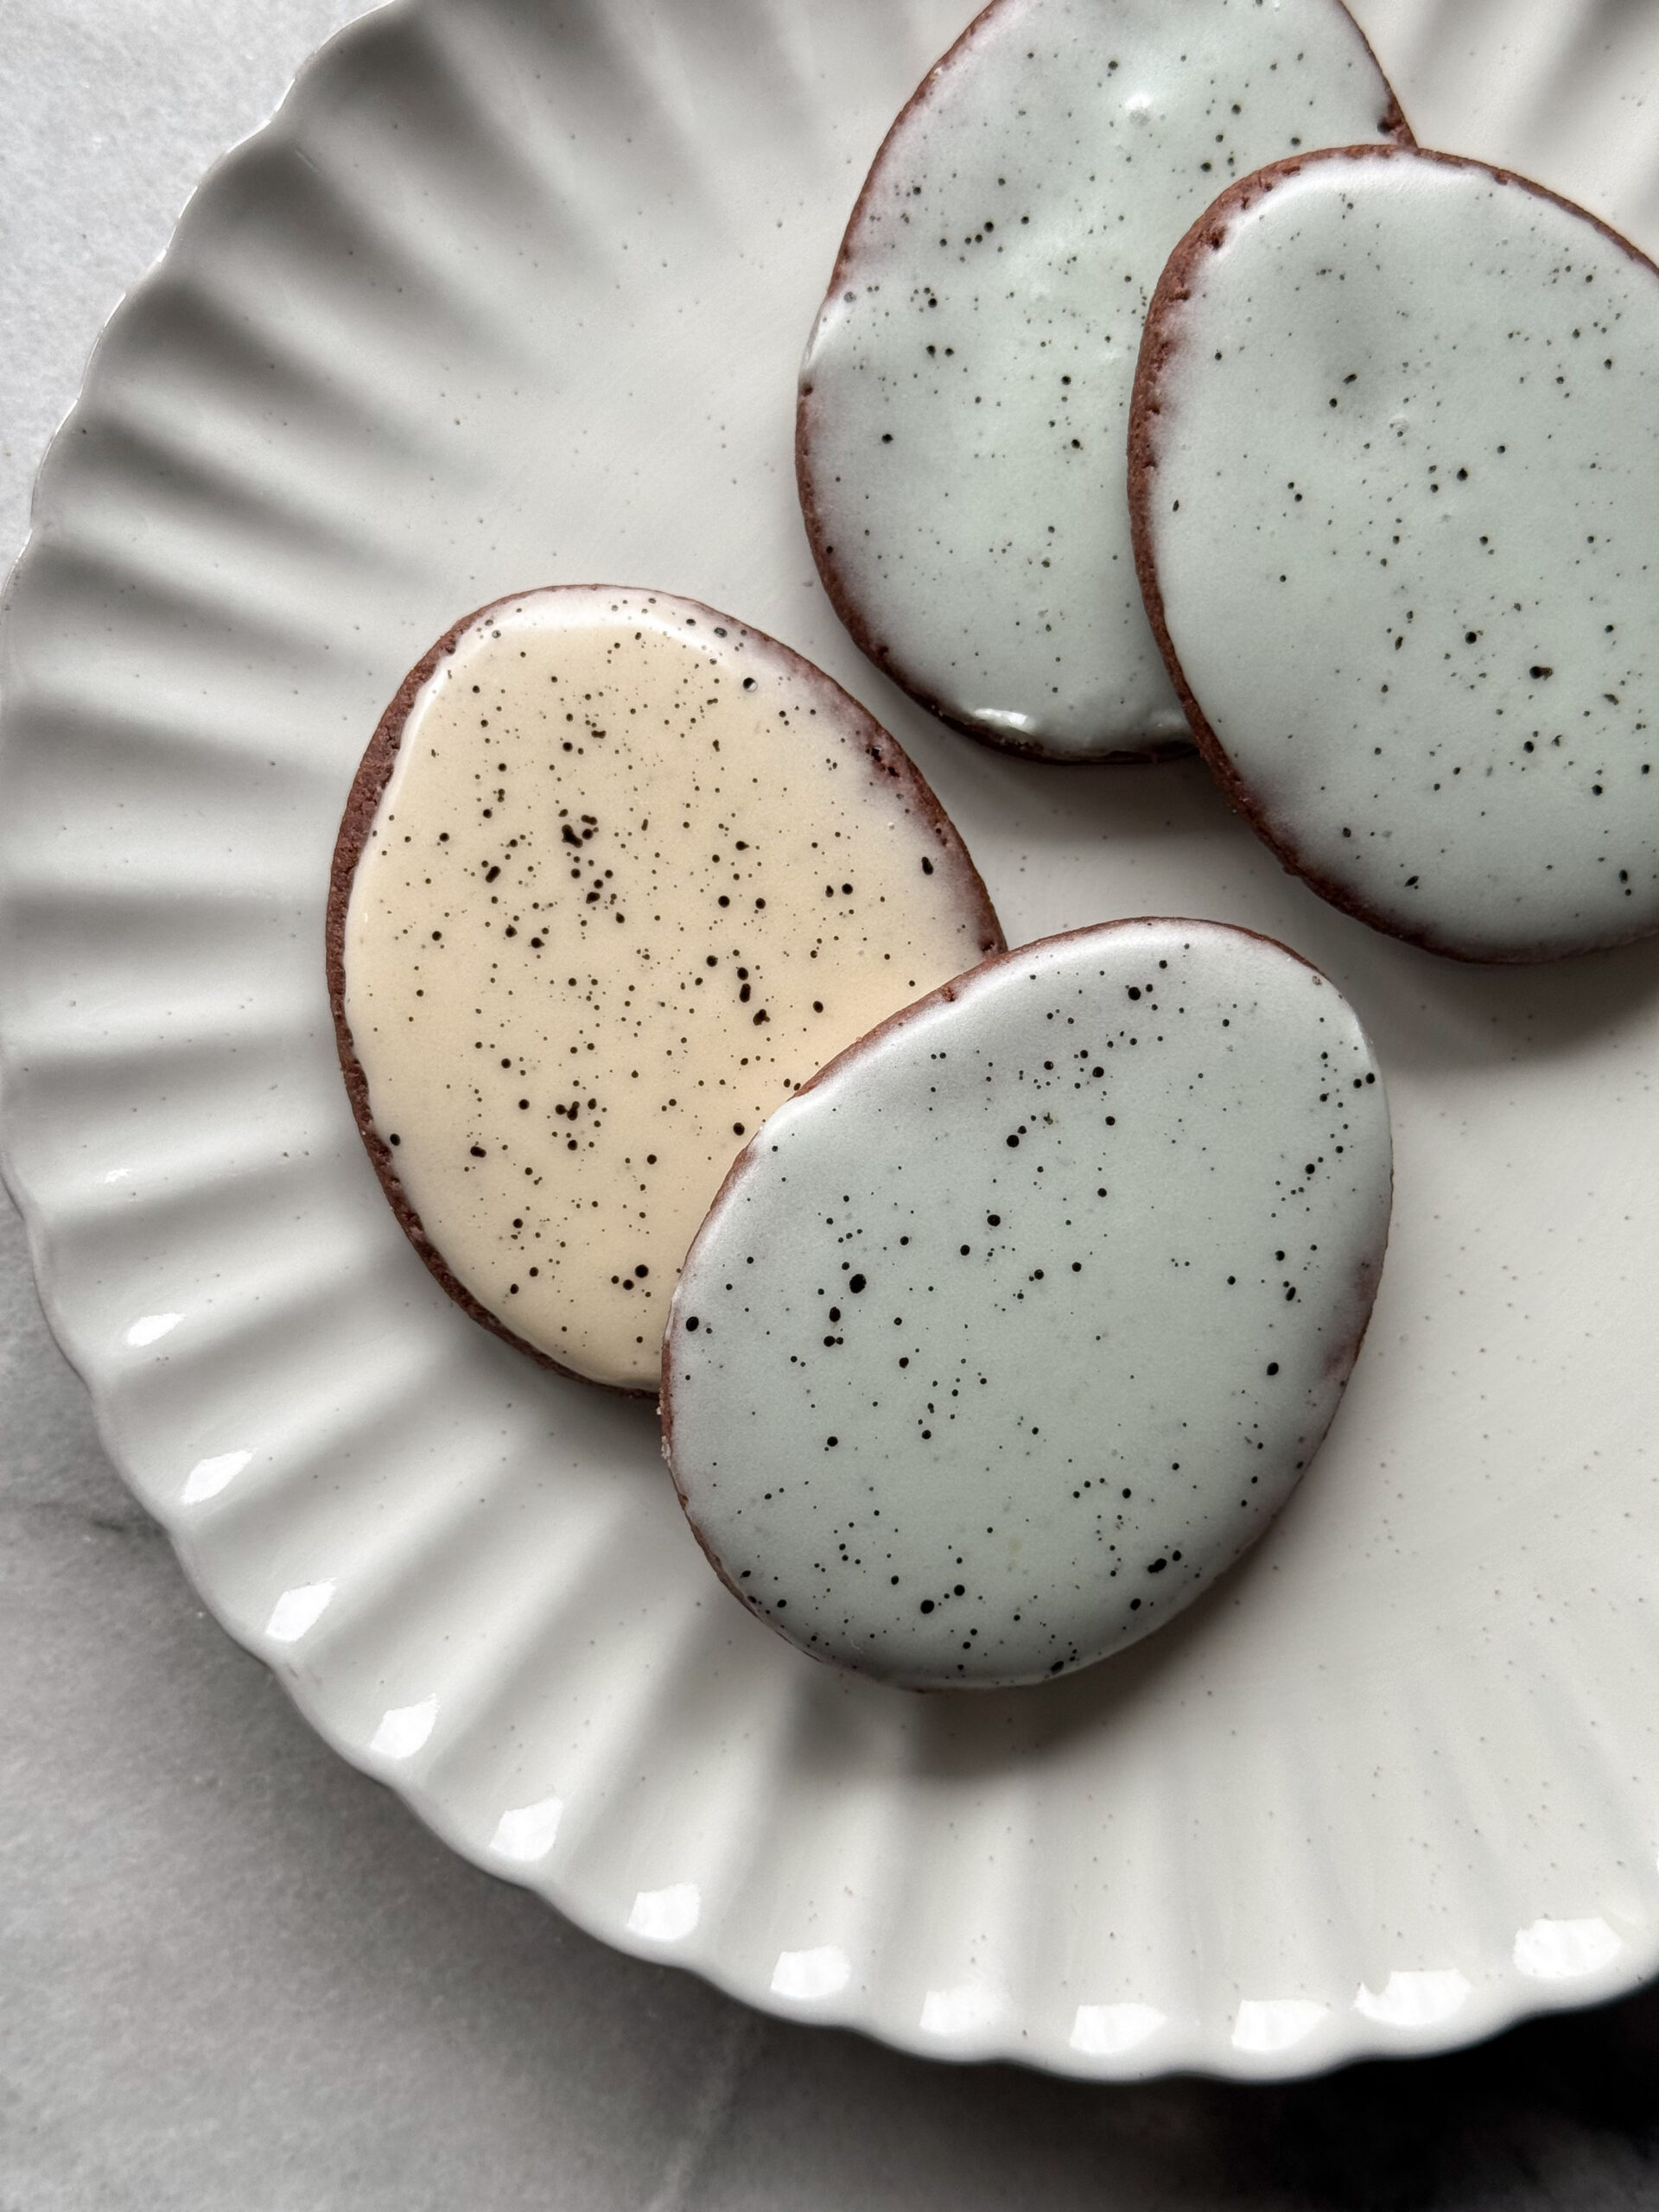
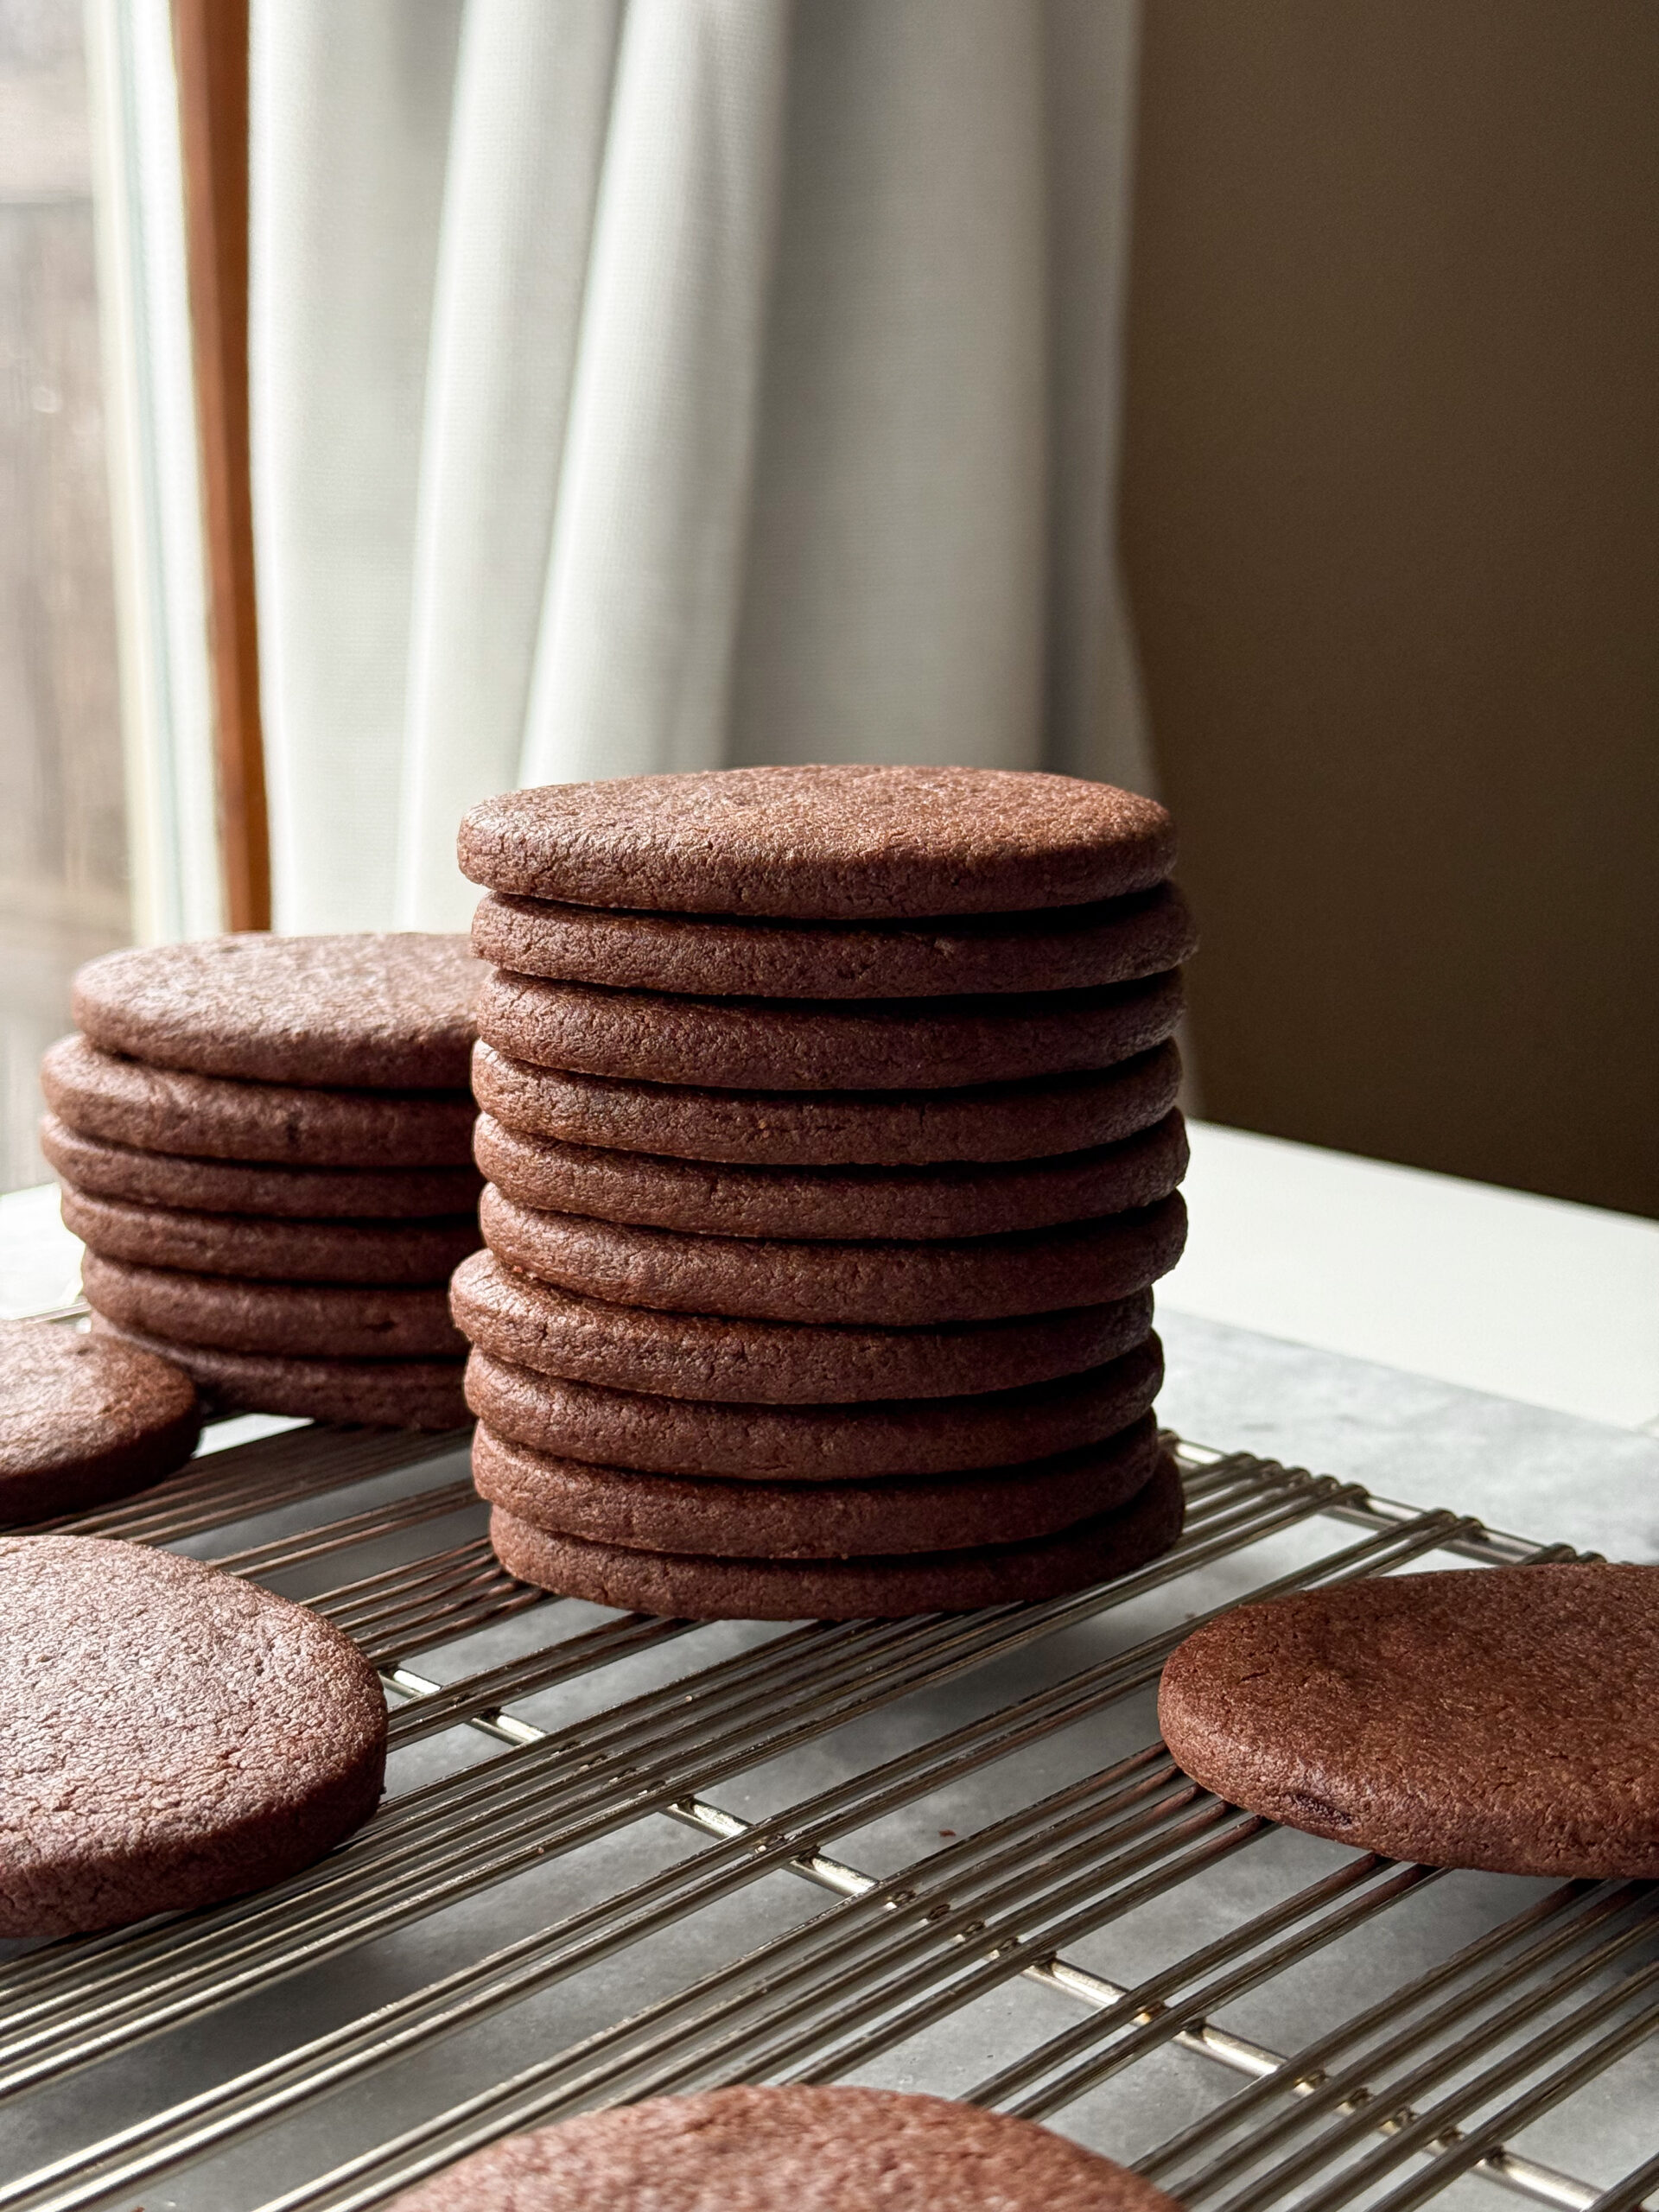
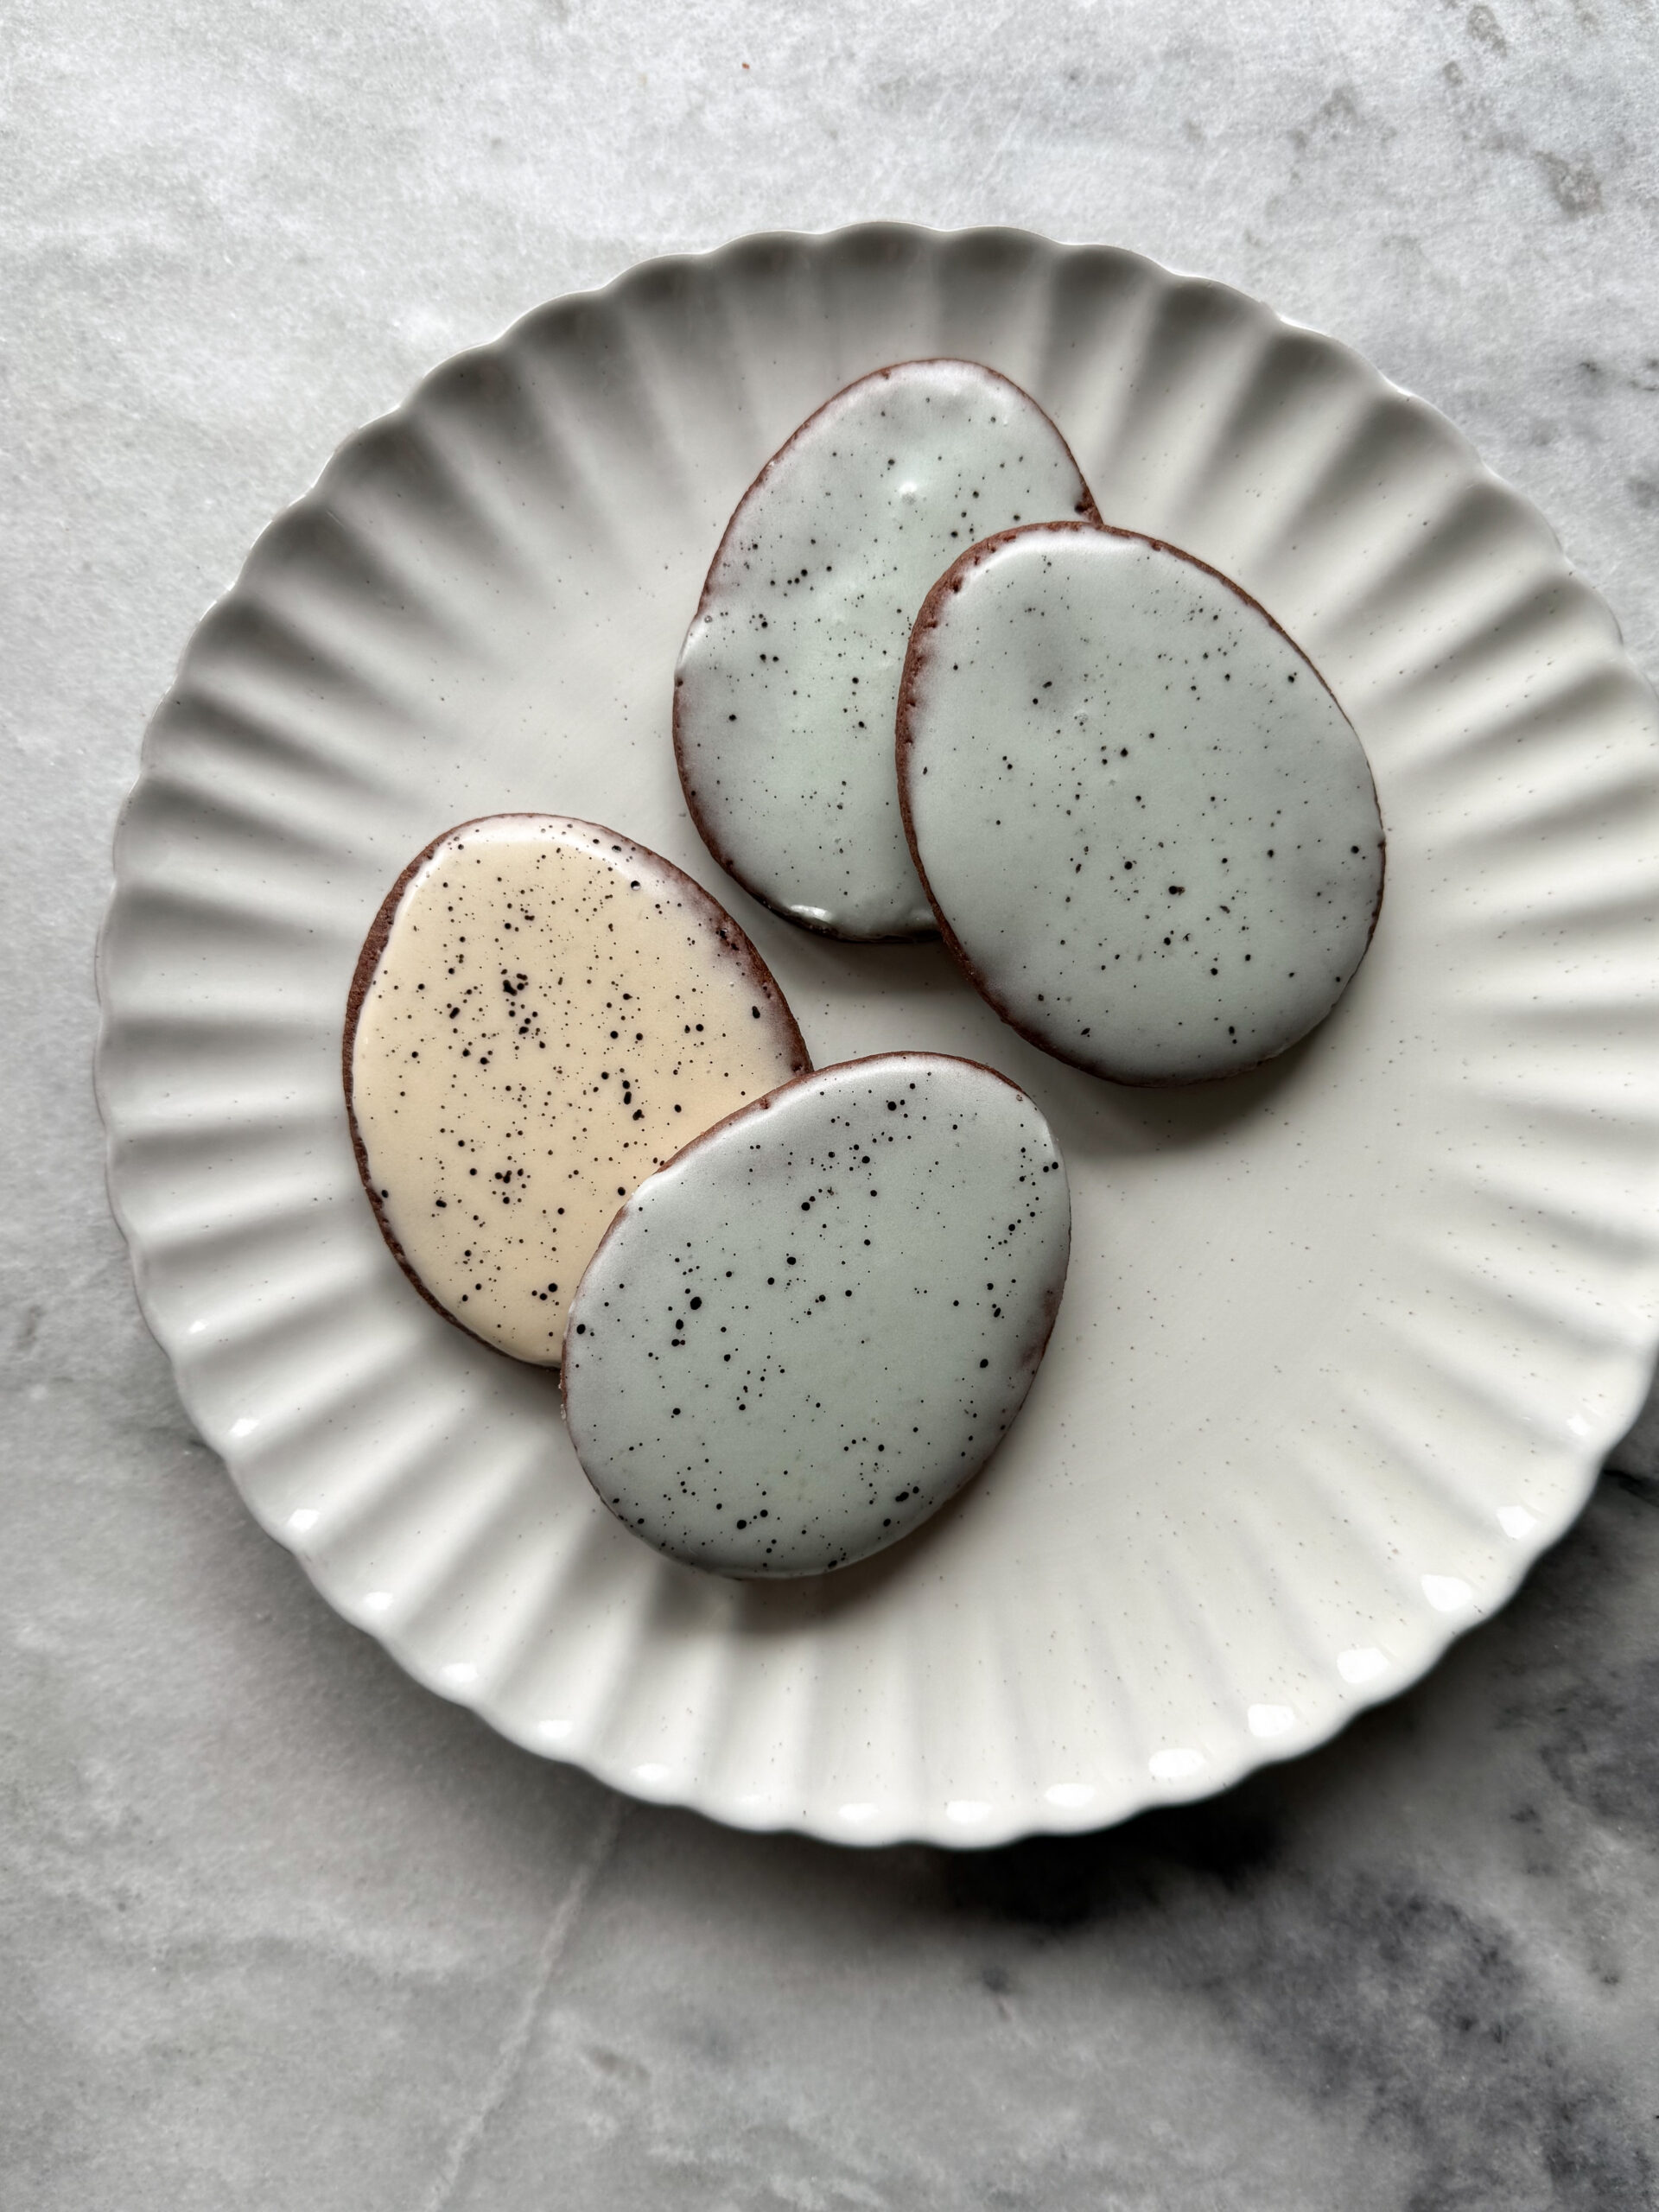
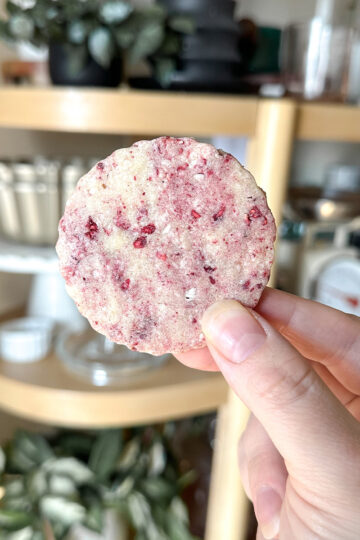
These chocolate sugar cookies are soft with a crisp edge and a rich chocolatey, malty flavor. You can decorate them with royal icing or with this delicious malty powdered sugar glaze that is perfect for quick and easy decorating by dipping. A splattering of food coloring makes these cookies perfect for spring.

ingredients in malted milk chocolate cut out cookies
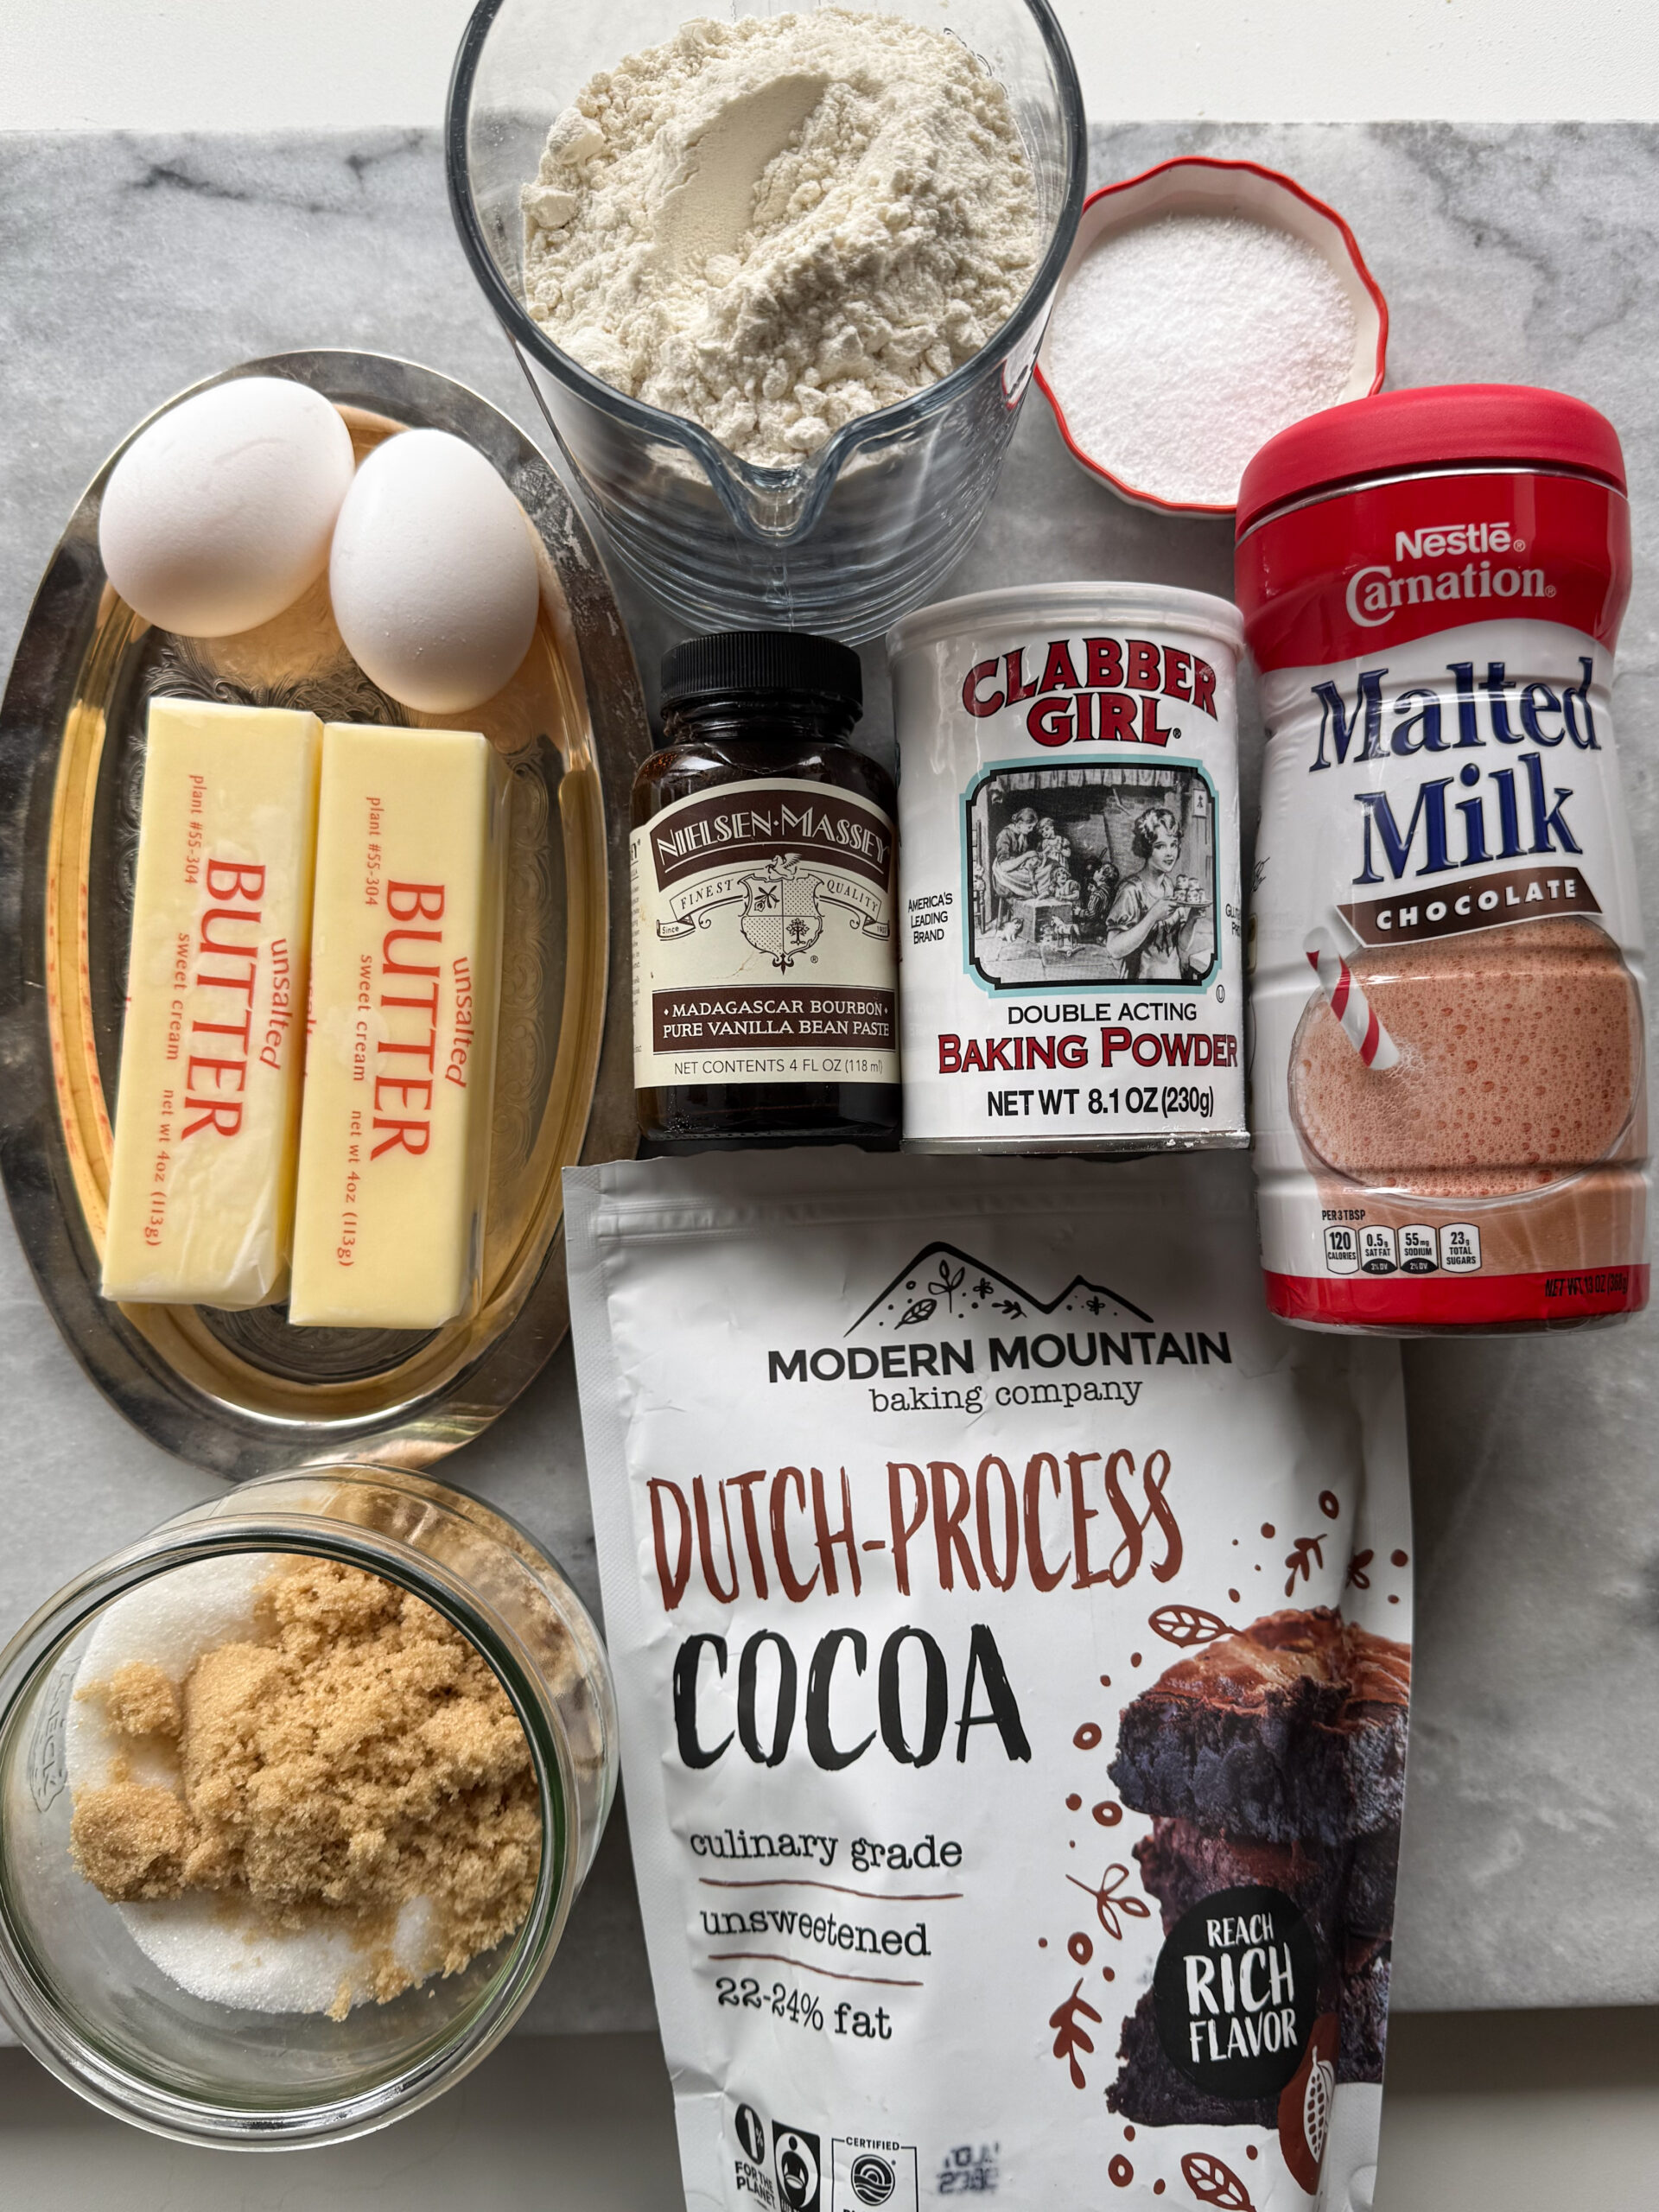
- butter– I always use unsalted butter in my recipes so I can accurately tell you how much salt to add, but the truth is that when I’m just baking personally, I use salted butter and nothing is ever too salty. Use what you have, but make sure that it has come to room temperature, about 66-70 degrees. Butter straight out of the fridge will not cream as well, which will either require too much creaming (creating too aerated of a mixture) or the final dough will have little pebbles of butter that will melt in the oven, causing uneven cookies. Make sure the butter hasn’t softened too much and become melty or squishy.
- sugar– I use granulated sugar and brown sugar in this cookie recipe. Granulated sugar gives a nice crisp edge, but brown sugar gives great chewiness and flavor.
- salt– Diamond Crystal kosher salt is the best for baking, so I recommend grabbing a box if you can. It will last you for a long time if you just use it for baking! If you don’t have this type of salt, swap for regular table salt and use half the amount called for.
- vanilla– Vanilla is essential for flavor in this recipe, and I recommend using vanilla bean paste instead of extract if you can. I love to use vanilla bean paste because the flavor is more intense, but vanilla extract is great as well. I love The Spice House, Heilala, and Nielsen-Massey. (Make sure to check your local Costco store for big jars of Nielsen-Massey at an amazing price!)
- eggs– An egg will give the cookie structure and tenderness. A whole egg is the simplest choice and works perfectly here. However, if you want the best flavor and texture in your final cookies, try using two egg yolks instead of one whole egg. It’s incredible and what I prefer. Of course, I understand the annoyance of having two extra egg whites you don’t know what to do with, so here are a few recipes to try out with those extra whites!
- cocoa powder– Dutch process for the chocolate flavor (It will replace some of the flour.) I like Modern Mountain Dutch process cocoa.
- flour– Flour provides the structure for this cookie, and this recipe has the perfect amount for the dough to both hold its shape, yet not be too floury and hard once baked.
- malted milk powder– Use the chocolate version for a more chocolatey boost.
- baking powder– for a little lift, but I don’t recommend it if you’re looking for cookies that don’t spread at all for decorating with royal icing.
*You can use my code EMILYLOGGANS for 10% off at The Spice House. I love to get my vanilla, almond extract, salt, and spices from there!
supplies needed to make these cookies
- hand mixer or stand mixer– A stand mixer makes this process so incredibly easy, but a hand mixer works just fine, especially if you’re just making a single batch.
- spatula– A spatula is essential to scrape down the bowl throughout the process. Without scraping, you’ll end up with an unevenly mixed dough and cookies that are inconsistent.
- scale– If there’s one thing I can convince you of, please let it be a kitchen scale. 🙏🏻Using a scale makes everything easier with baking, and it ensures you get the same results every time. Flour is so easy to over-add with volume measurements, and a scale solves that problem.
- parchment paper– I always roll my dough between two sheets of pre-cut parchment paper, which is by far the best way to roll out dough.
- guided rolling pin– Rolling dough evenly is tricky with a regular rolling pin, but with a guided rolling pin, dough comes out evenly every time. It’s such a time saver and one of my favorite kitchen tools.
- baking sheets– I use these cookie sheets for years, and they are amazing.
- cookie cutters– Whichever shapes you like!

tips for making malted milk chocolate cut out sugar cookies
The dough comes together very easily, like most sugar cookie doughs. Cream the butter and sugar, add the egg and vanilla, then the dry ingredients. Once the dough has come together, chill for two hours or up to five days (if well wrapped and sealed) in the fridge.
If I’m going to be using the dough right away (after the two hour chill time), I prefer to roll the dough between parchment immediately after mixing and then chill it. If I’m going to let it chill for longer, I like to wrap it tightly in plastic, put it in a ziplock, and store in the fridge until I’m ready to use it. When I’m ready to use it, I just let it come to room temperature before rolling it out between parchment. If the dough is at all soft at this point, pop it in the freezer for 5-10 minutes before cutting shapes.
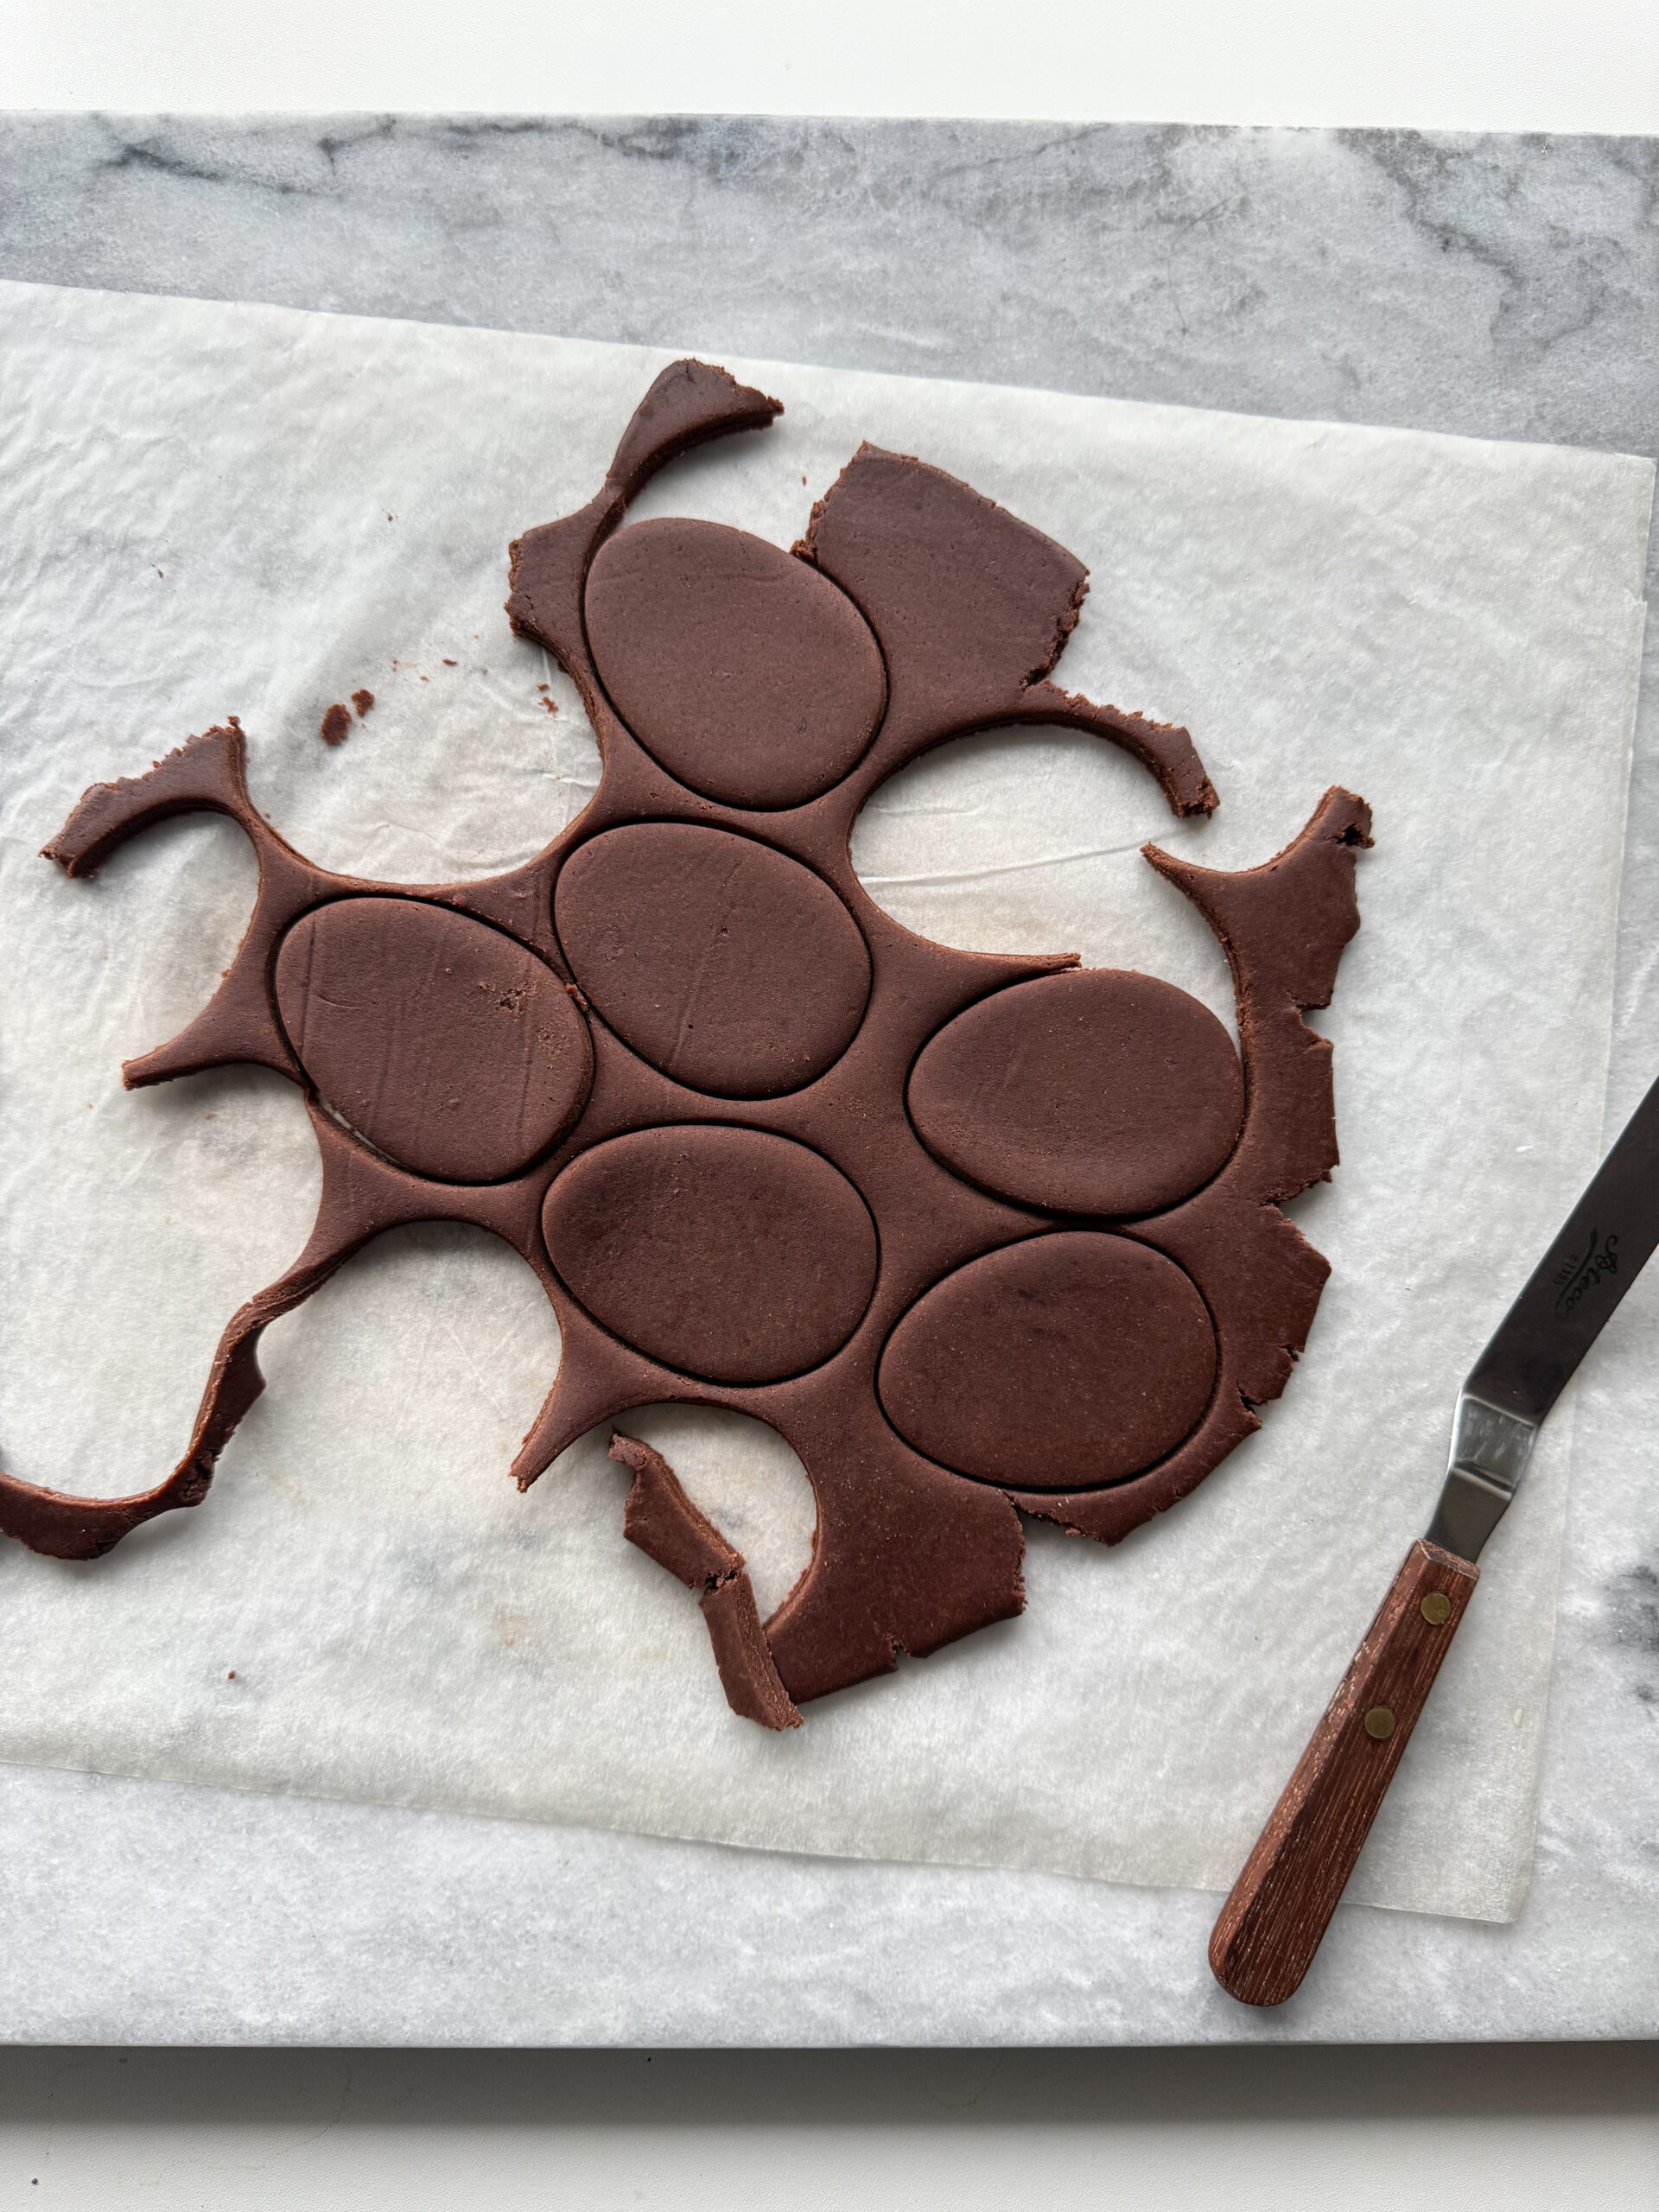
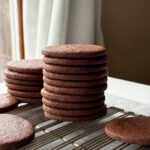
My cookie cutter was on the smaller side, about 3″, and I got 32 cookies total with re-rolling with my dough rolled at ¼″. If you roll thicker, you’ll have fewer cookies, and if you have bigger cookies, you’ll have fewer cookies.
When I made these the most recent time, I wanted to see how they would be if I added ½ teaspoon of baking powder. It’s not a lot, but it is enough to cause some puffing and add a little lift to the baked cookies. If you’re a cookie decorator looking for a recipe that doesn’t spread, you will probably want to skip the baking powder entirely.
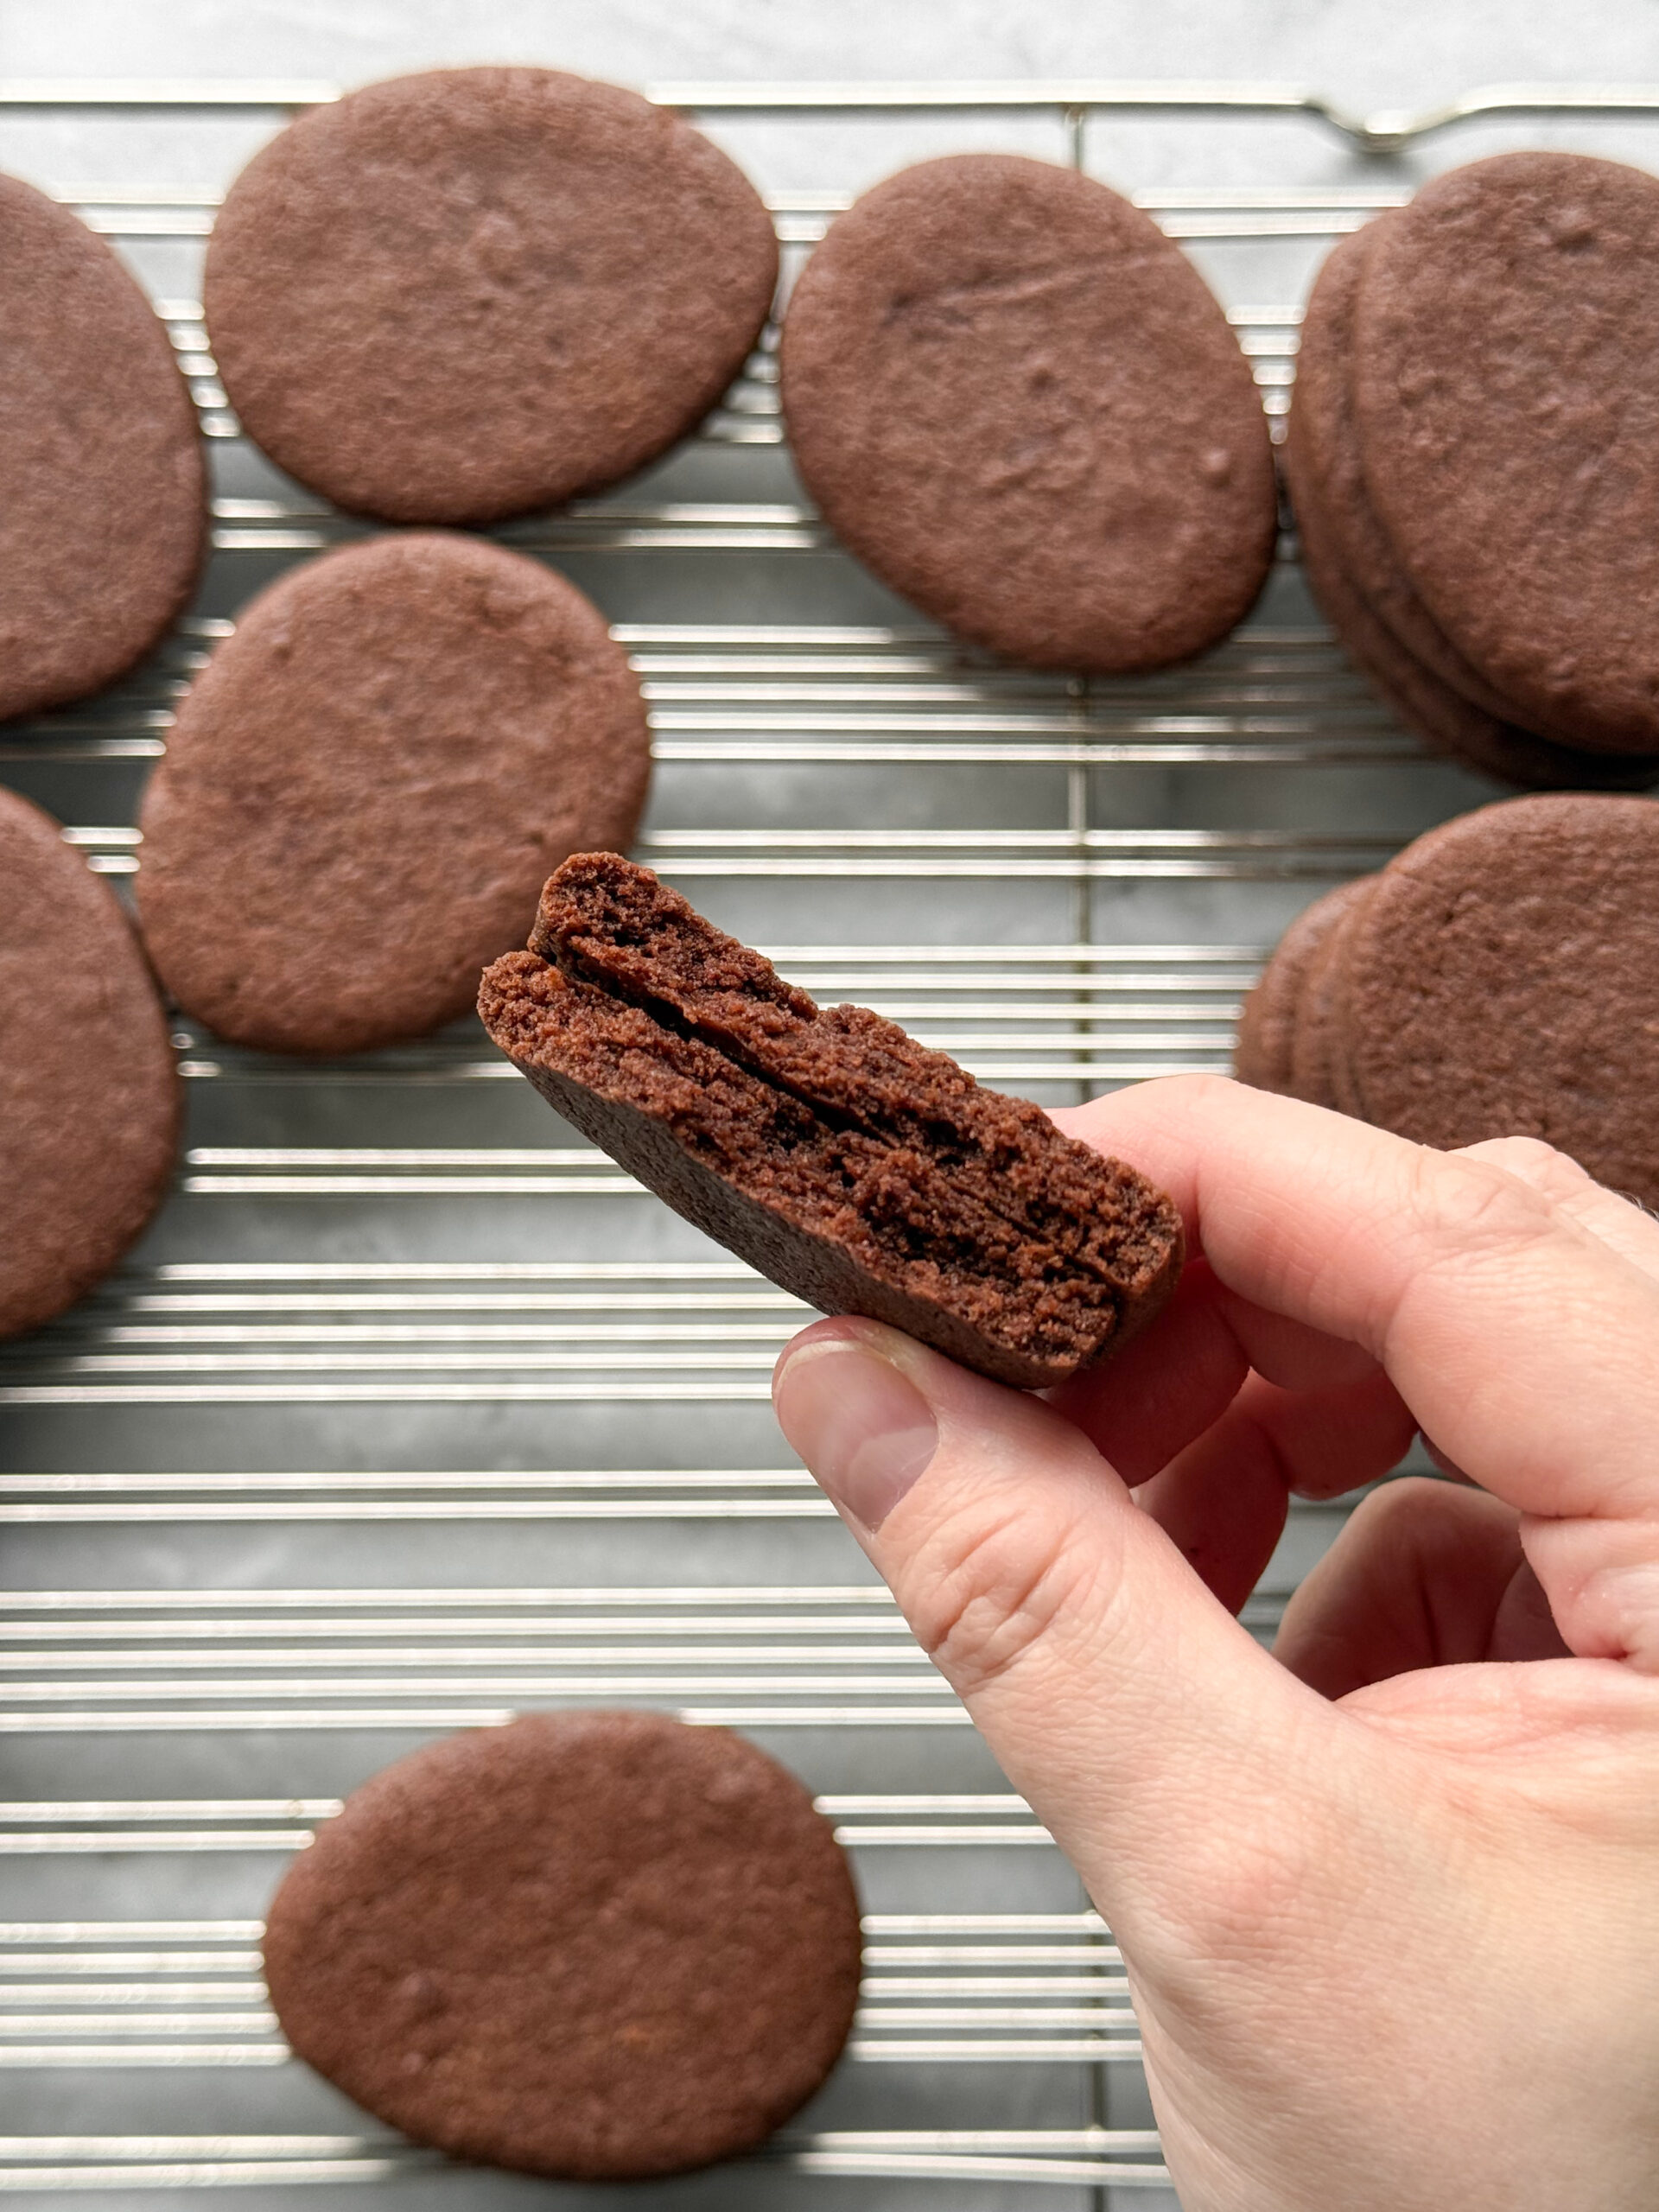
If you’re looking for a softer cookie, don’t over bake them. Bake them just until they’re set and the tops are not shiny. This dough will also work well as a thinner and crispier cookie, however. Just bake them a bit longer and roll thinner.
making the malty vanilla glaze
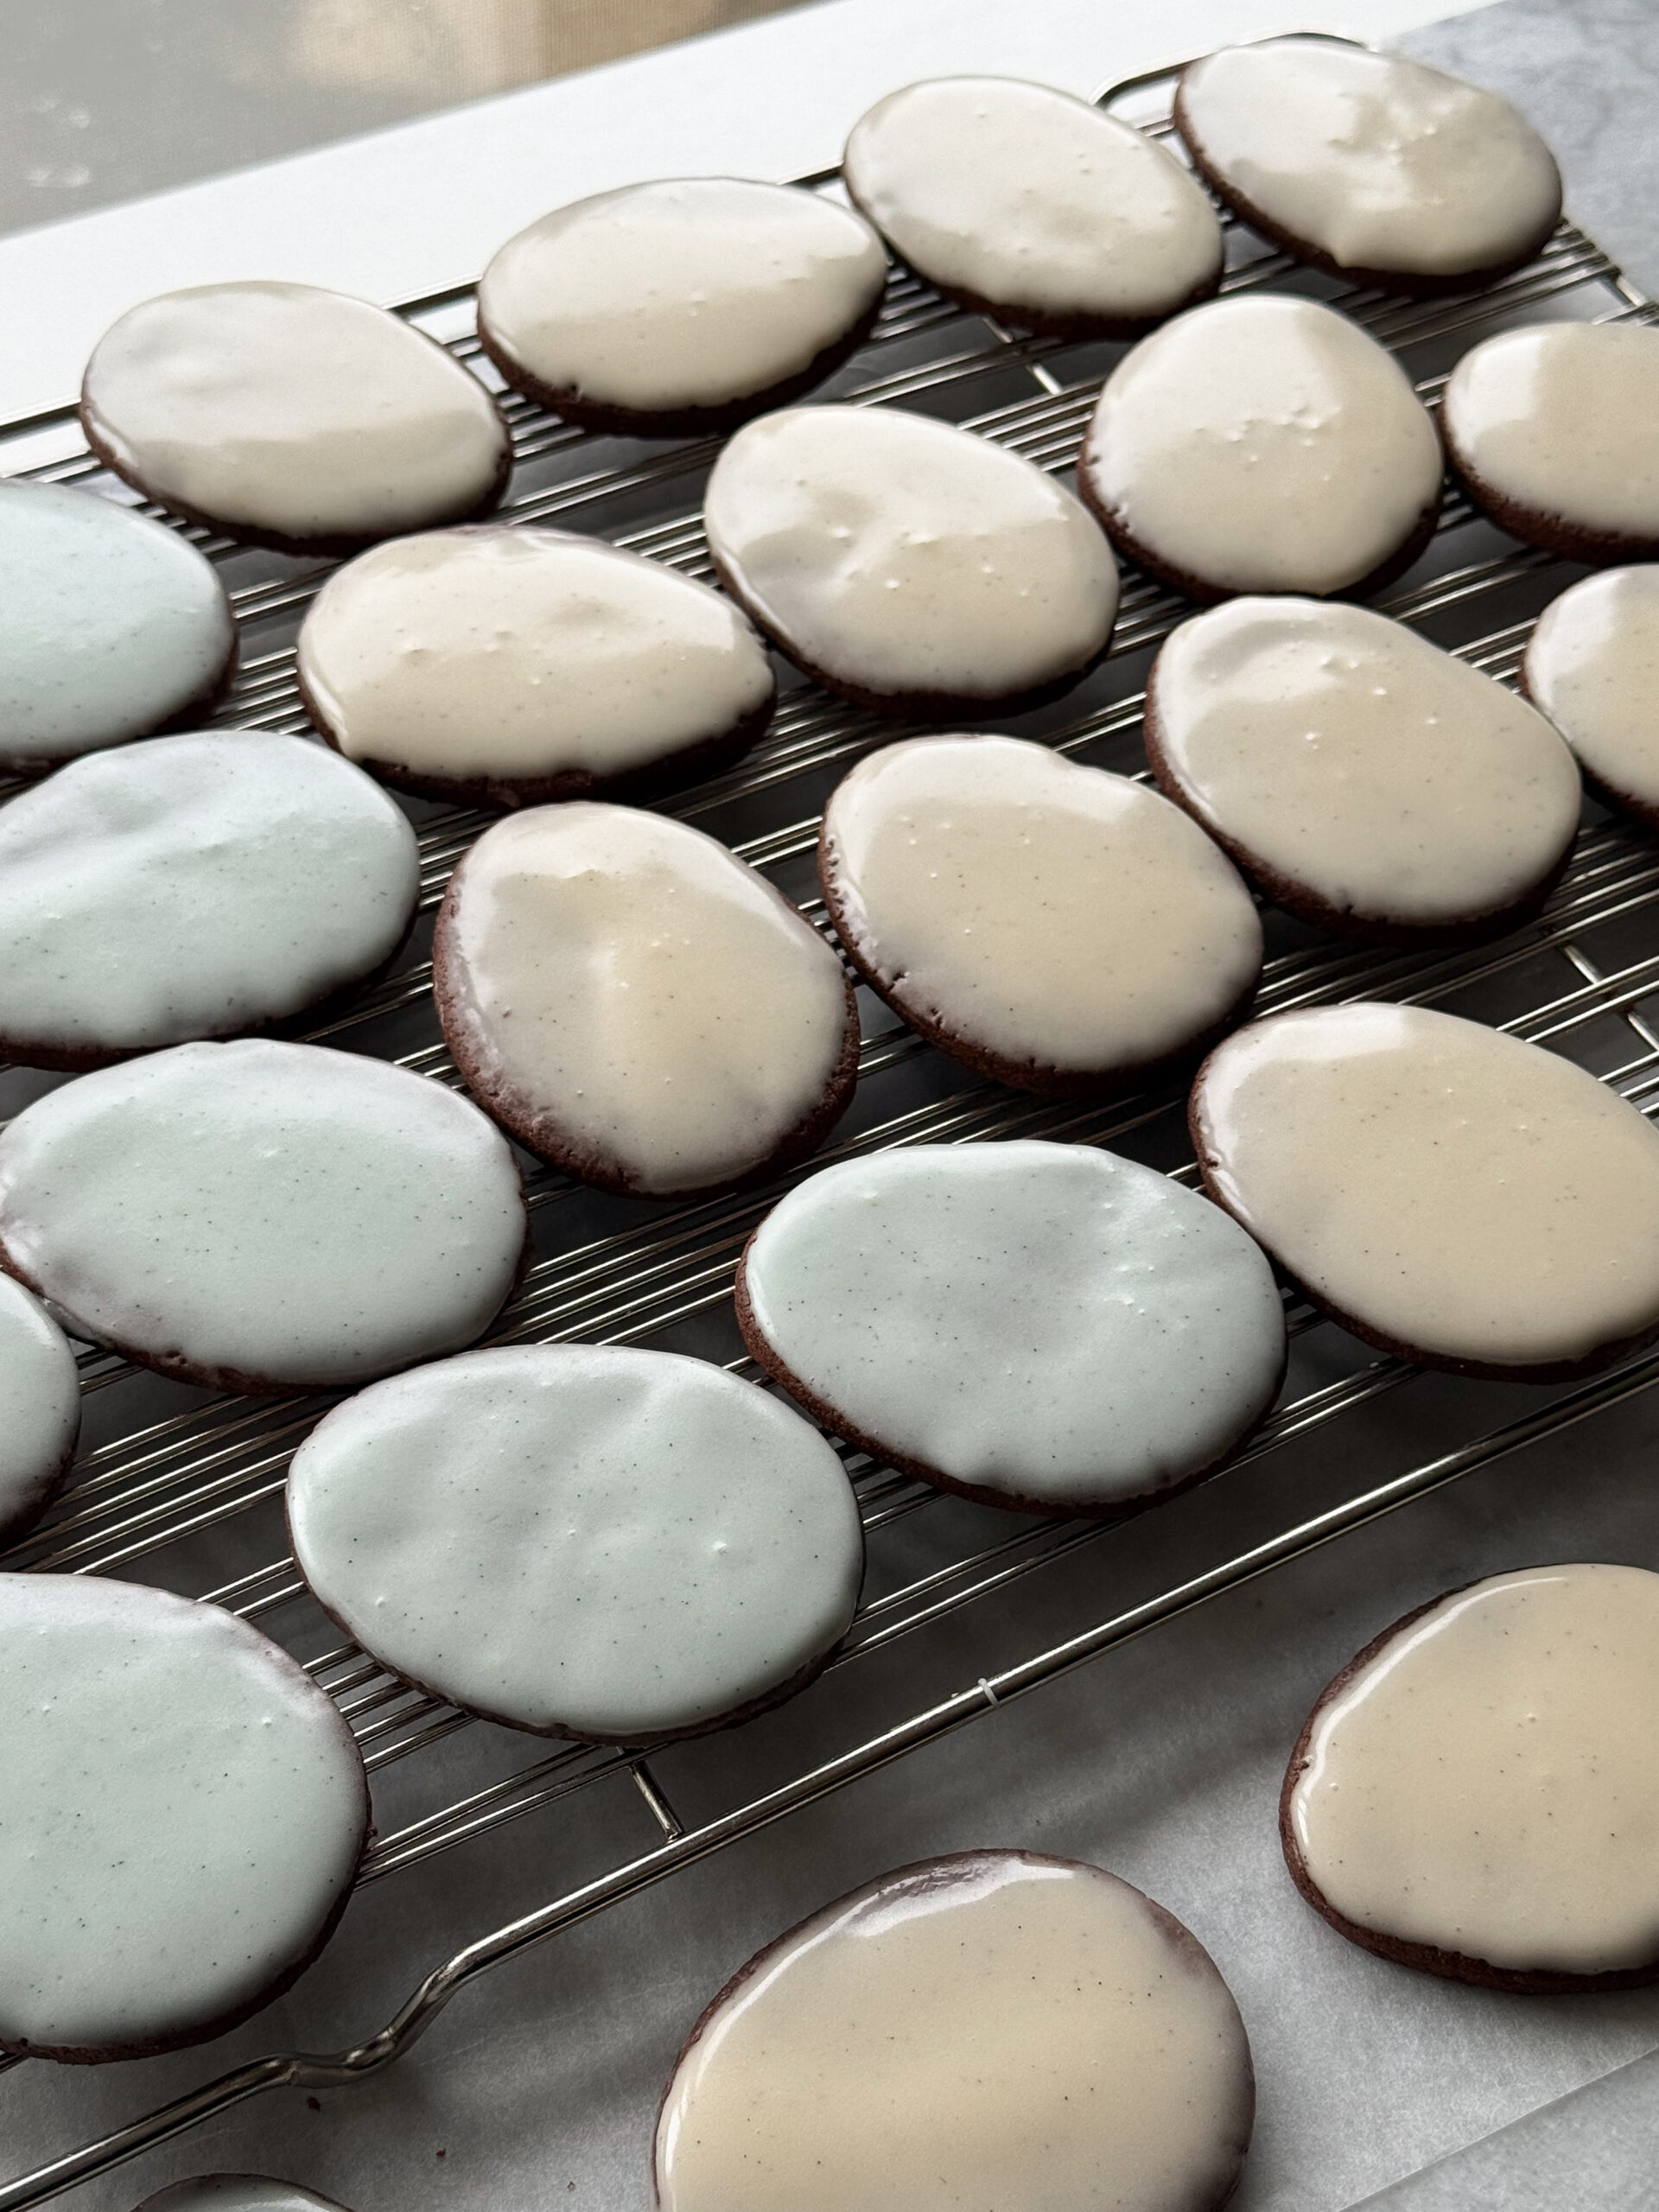
The glaze is extremely easy- just make sure to fully dissolve the malted milk powder so there are no lumps. Stir all the ingredients together and dip the cookies in the glaze, allowing the excess glaze to drip off into the bowl.
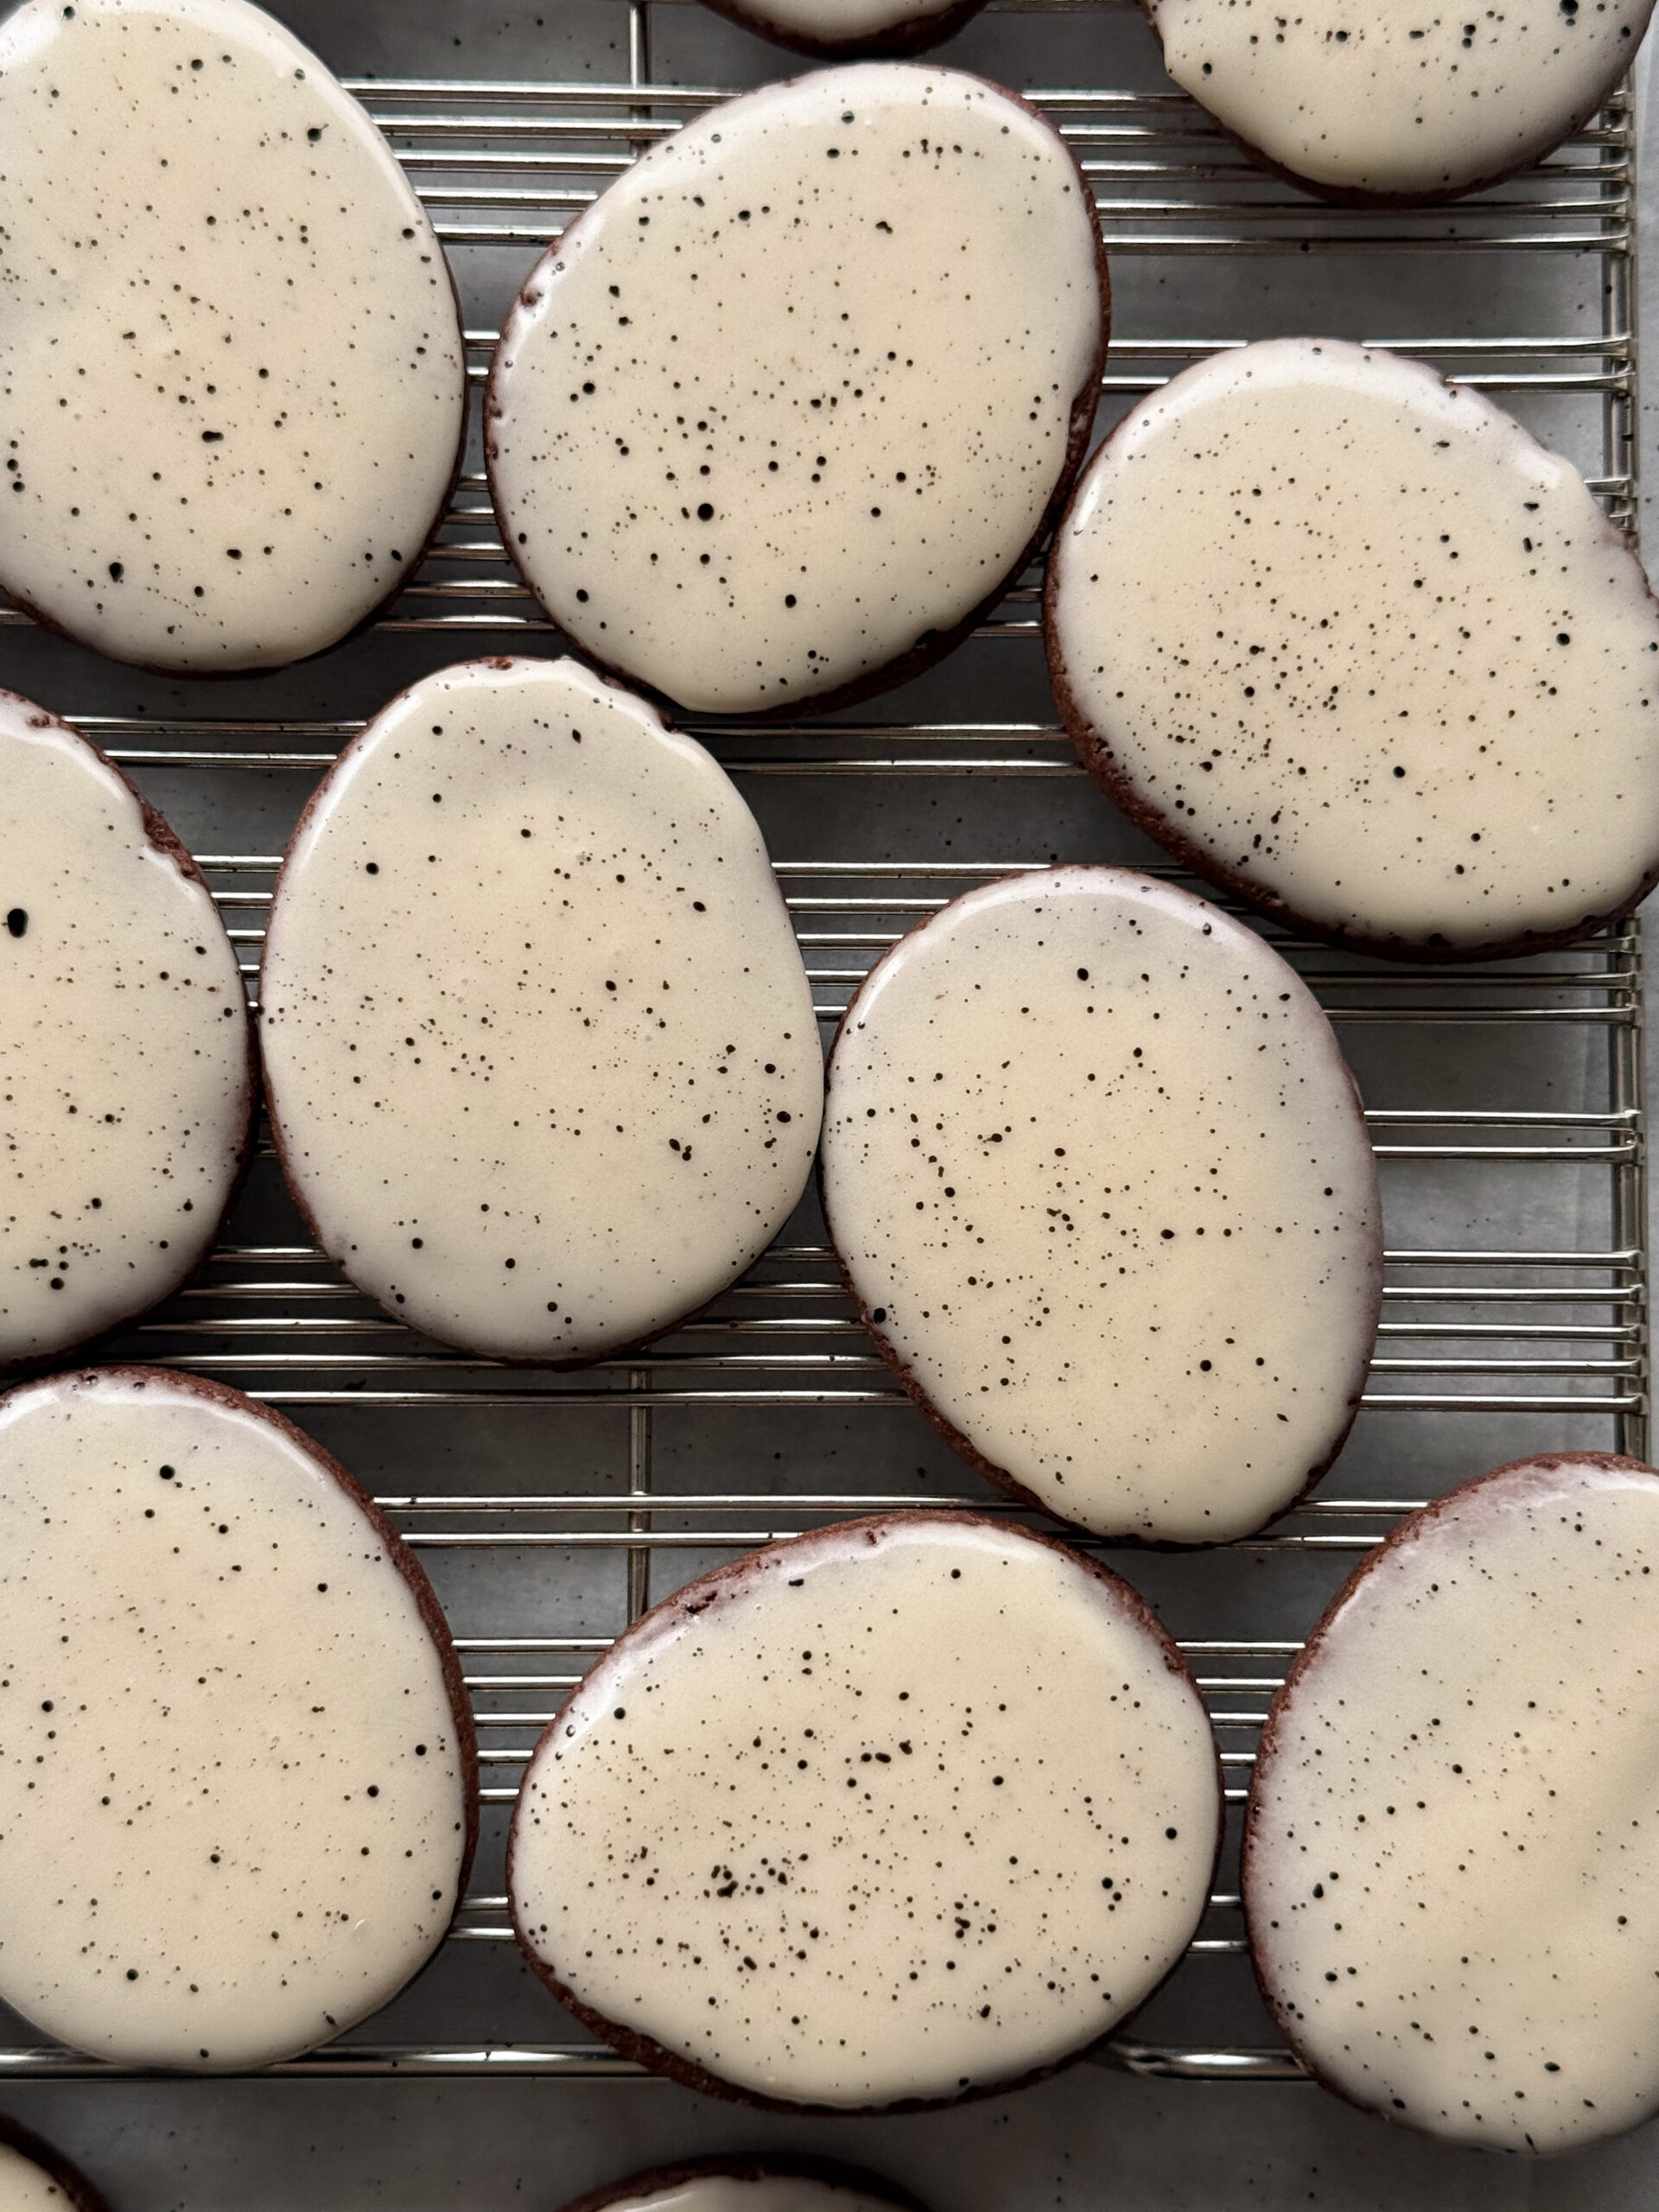
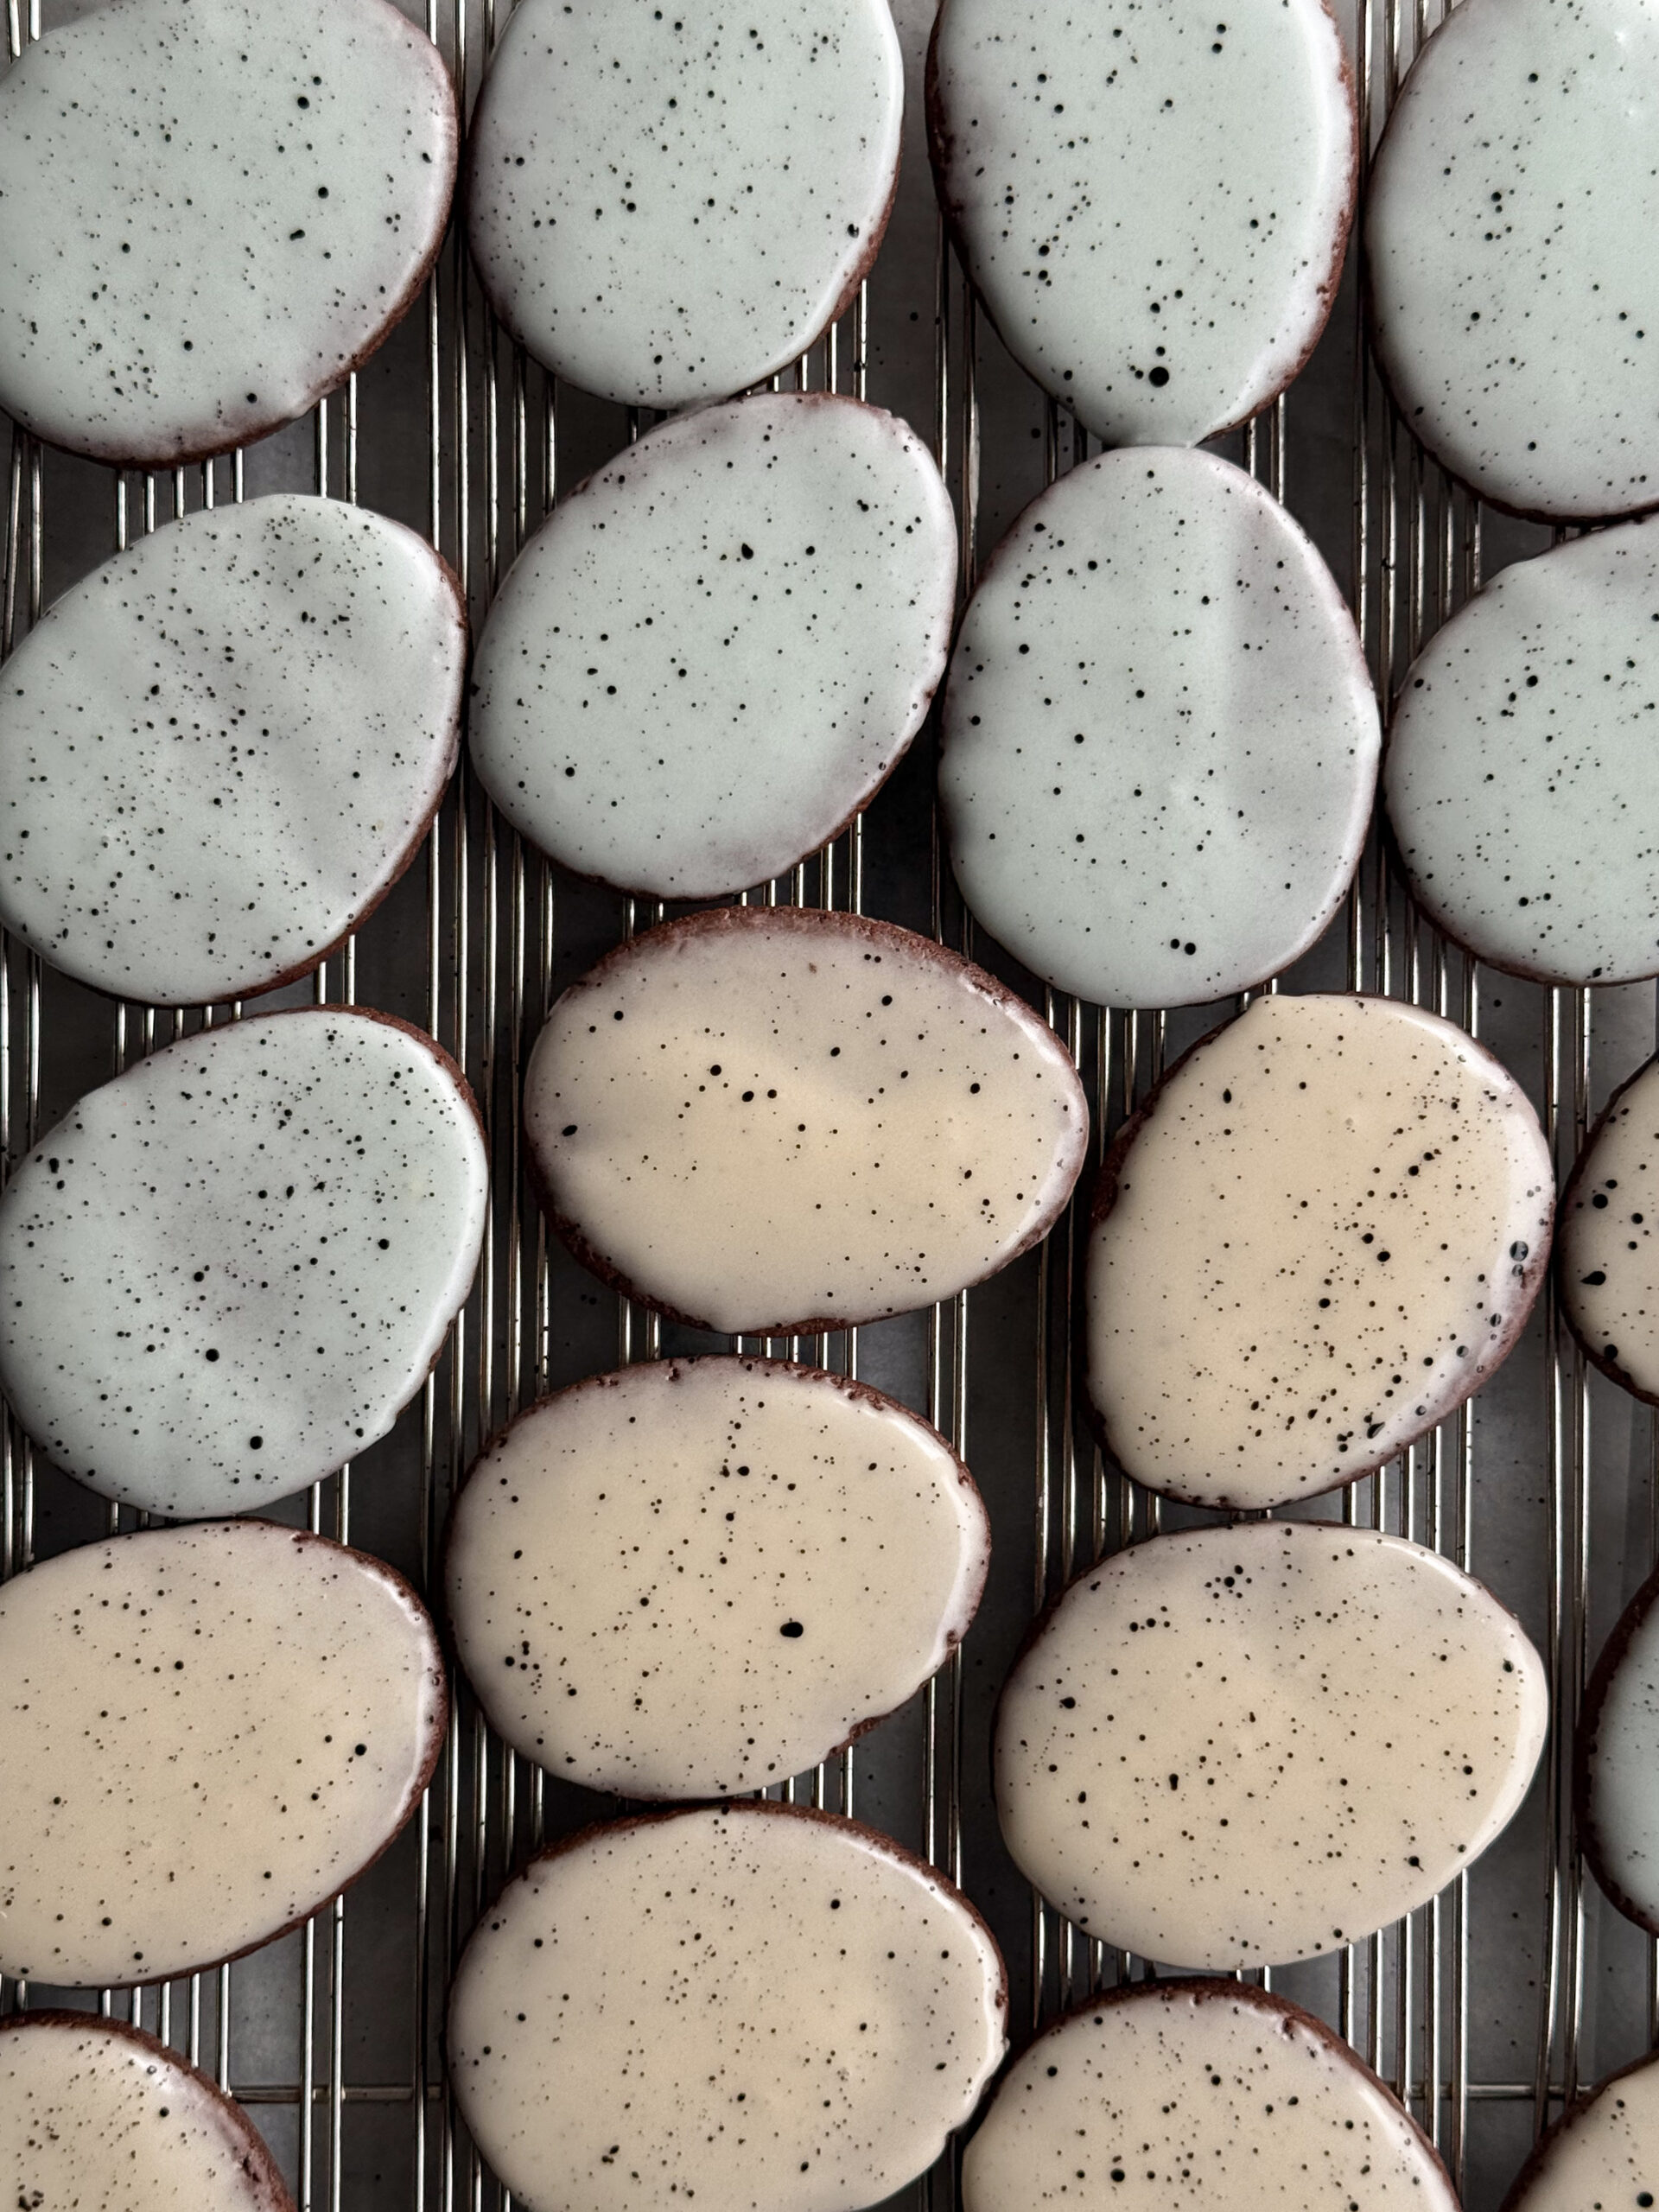
Once the glaze has had time to set, mix a little black or brown food coloring with some water and splatter all over the cookies with a paintbrush.
malted milk chocolate cut out sugar cookies with vanilla salty malty glaze
These chocolate sugar cookies are soft with a crisp edge and a rich chocolatey, malty flavor. You can decorate them with royal icing or with this delicious malty powdered sugar glaze that is perfect for quick and easy decorating by dipping. A splattering of food coloring makes these cookies perfect for spring.
Ingredients
malted milk chocolate sugar cookies
226g unsalted butter, room temperature (1 cup)
100g granulated sugar (½ cup)
55g brown sugar (¼ cup, packed)
1 tsp Diamond Crystal kosher salt (or ½ tsp regular table salt)
1 whole egg OR 2 egg yolks (large sized)
1 tsp vanilla bean paste or extract
270g all purpose flour (2 ¼ cup)
55g Dutch process cocoa powder (⅔ cup + 1 Tbsp)
45g malted milk powder, chocolate version (¼ cup)
½ tsp baking powder, optional (skip if you’re going to decorate with royal icing and prefer less spread and puff)
vanilla salty malty glaze
120g powdered sugar (1 cup)
2 Tbsp whole milk (plus a little extra just in case)
1 Tbsp malted milk powder (original, not chocolate)
1 Tbsp corn syrup
1 Tbsp butter, melted
¼ tsp Diamond Crystal kosher salt (or ⅛ tsp regular table salt)
½ tsp vanilla bean paste or extract
Instructions
make the cookie dough
Starting with room temperature butter, mix with the sugars and salt until slightly creamed (lighter, fully combined). Add the vanilla and egg, mixing until just combined. Scrape the sides and bottom of the mixer bowl to make sure there are no bits that haven’t been mixed.
Add the flour, cocoa powder, malted milk powder, and baking powder (if using). Mix on low speed until the dry ingredients are fully incorporated.
Roll the dough between parchment to your desired thickness, I like ¼″, before chilling for about two hours (or up to five days if it’s sealed sufficiently).
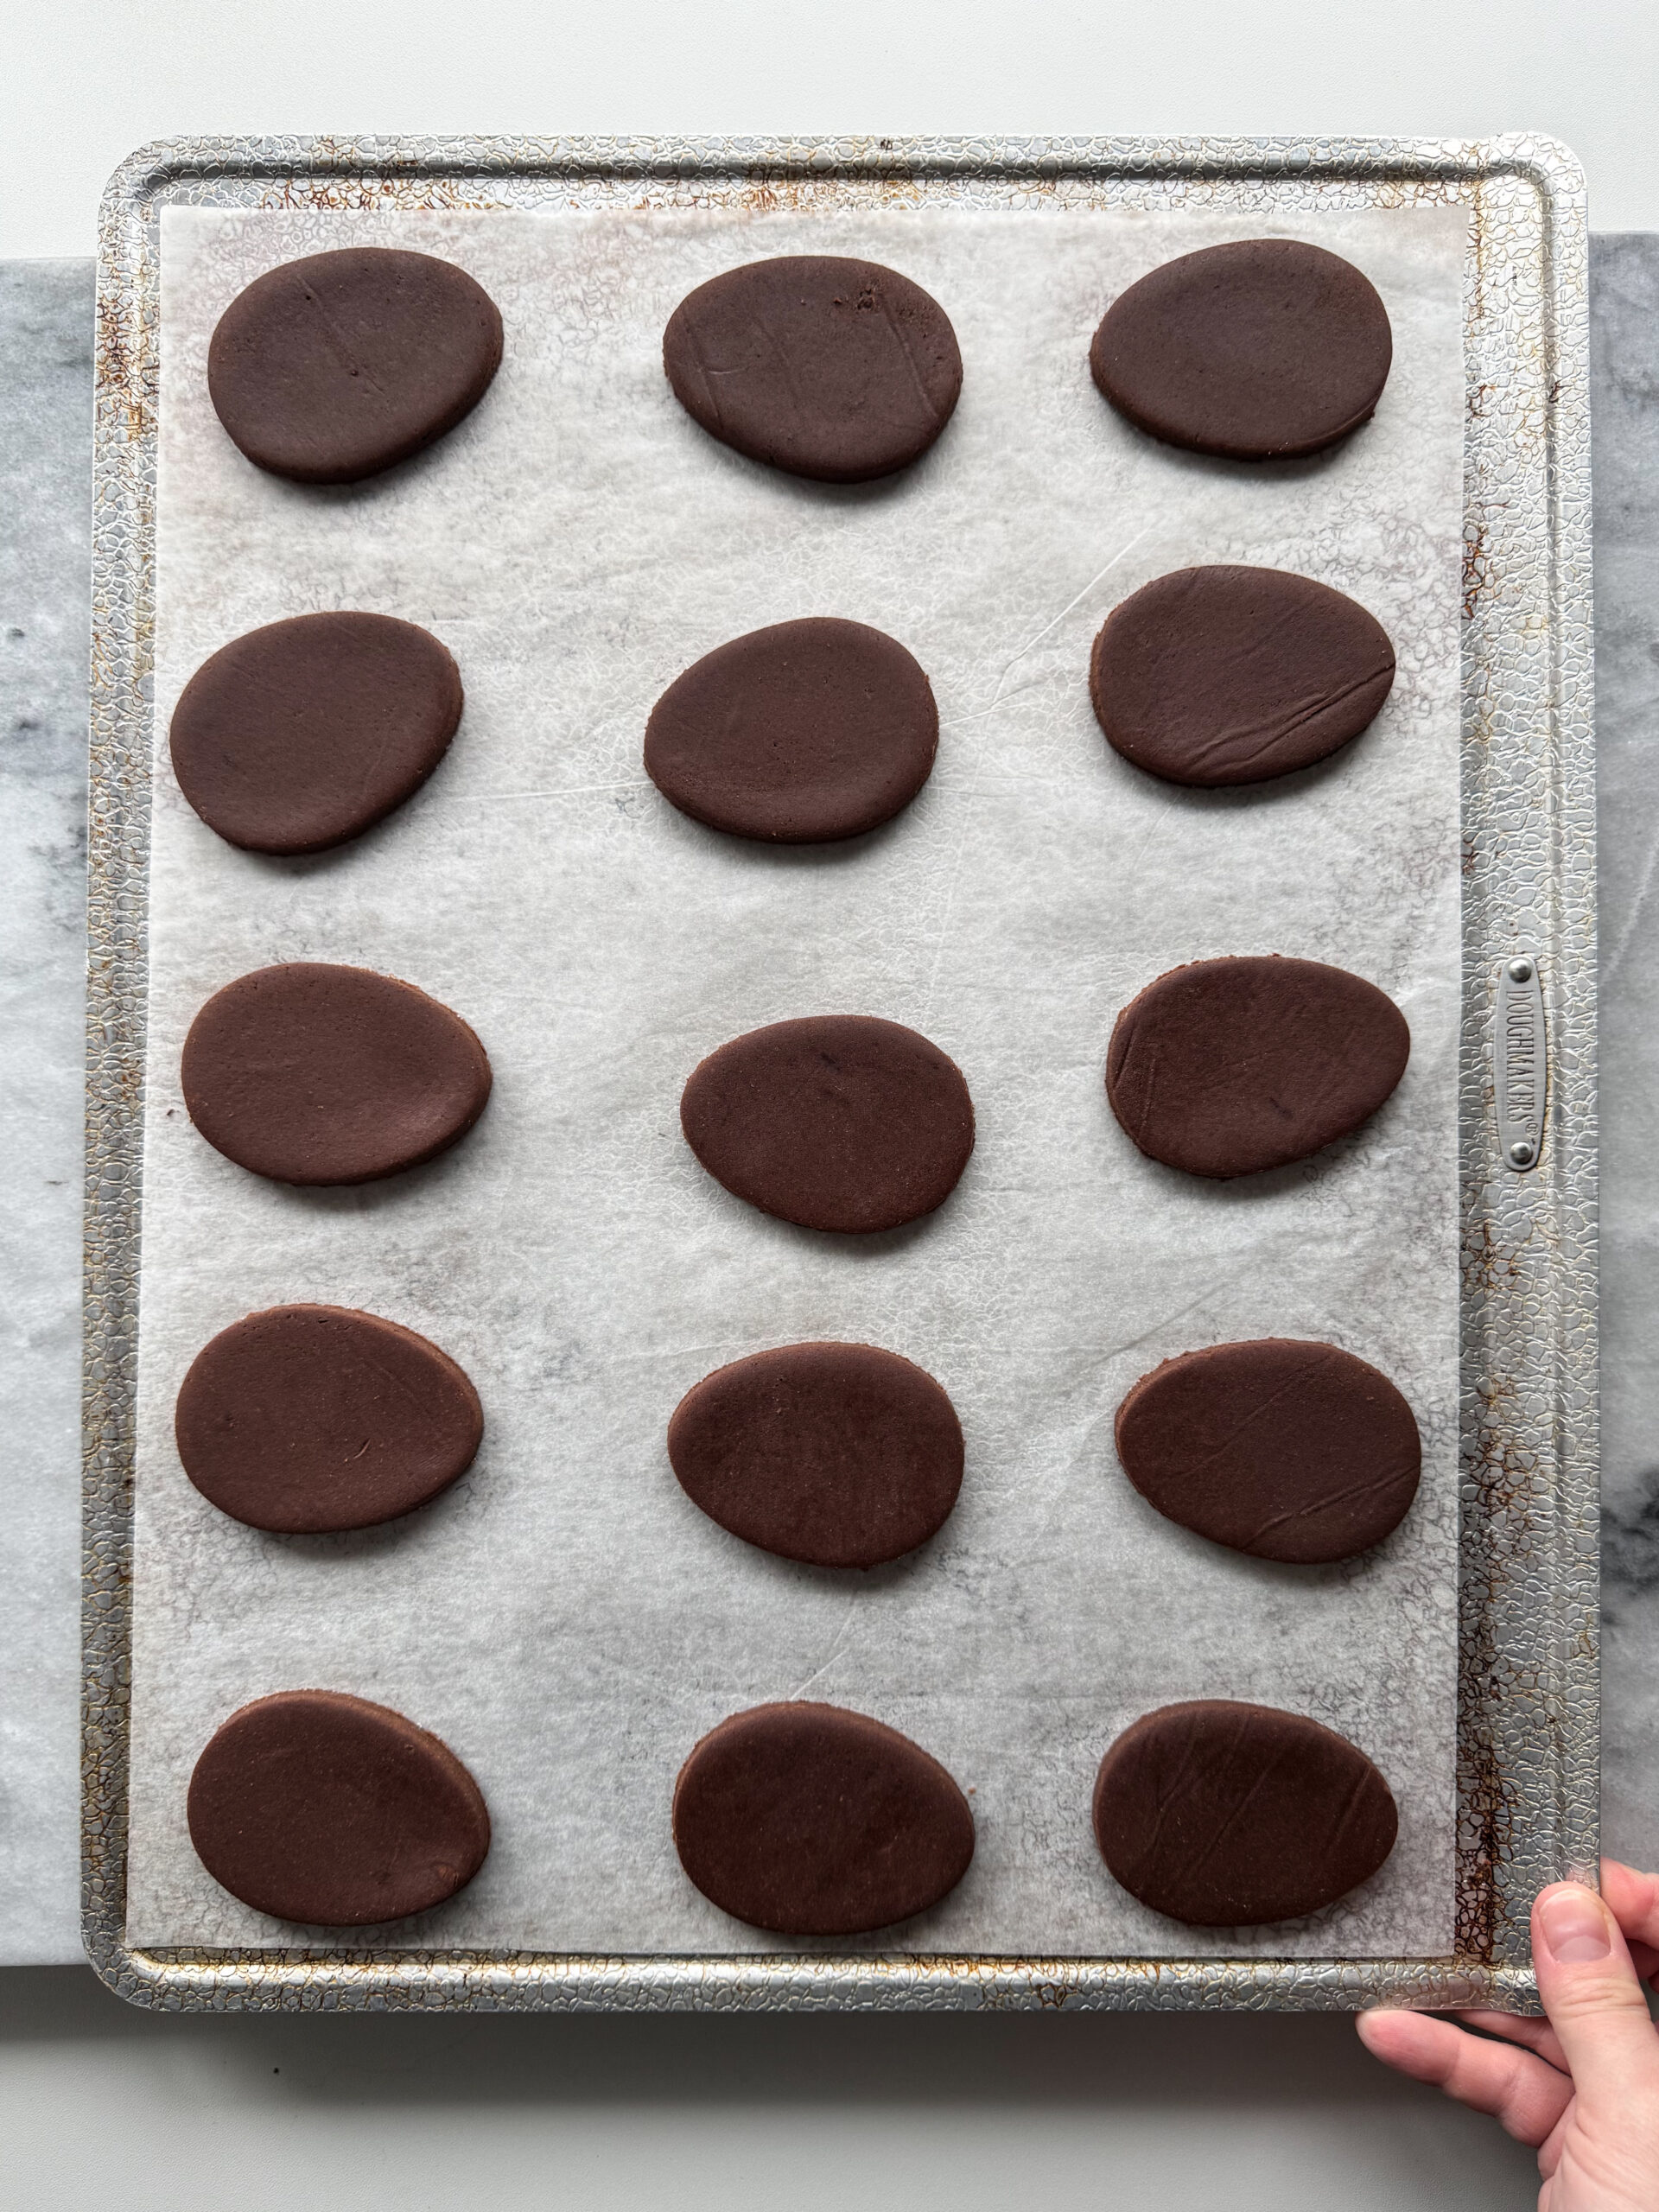
When it’s time to bake, preheat the oven to 375 F (190 C) and cut shapes from the dough. Re-roll the scraps, chill for about 10 minutes, and cut shapes again. To help keep the shapes of the cookies, I like to chill the cut shapes for about 10 minutes before baking them. This works out as one sheet is chilling while the other bakes. You can chill in the fridge or freezer.
Bake the cookies until they’re fully set and no longer shiny. This cookie is meant to be softer, so don’t over bake. If you prefer a crunchier cookie, roll a bit thinner and bake for longer.
Once the cookies are baked, allow them to cool for five minutes on the sheet before transferring to a wire rack to cool completely. Moving them prematurely can cause them to break.
make the vanilla salty malty glaze
*If you’re a person who likes a good amount of icing, or if you make the icing on the thicker side, you may want to double the glaze icing recipe.
While the cookies are cooling, make the glaze. To a shallow, wide mouthed bowl (or at least a bowl with a mouth wide enough to dip the cookie into), add the powdered sugar, milk, and malted milk powder. Stir well until the malted milk powder has dissolved. Add the corn syrup, melted butter, salt, and vanilla and stir until well combined. The consistency should be thick but pourable. It should ribbon off a spatula. If it is too thick, add more milk (a little at a time) until it is the right consistency. If it is too thin, add a bit more powdered sugar until it is the right consistency.
If you’d like to color the icing, now is the time. You can color the entire bowl of icing or separate it into smaller bowls for more variety of colors. (You may want to double the icing recipe if you want multiple colors.)
Dip each cookie by holding it securely upside down and gently pressing it into the surface of the icing, allowing the entirety of the cookie to come into contact with the icing. Allow the excess to drip off back into the bowl. Place the cookie down on a wire rack or piece of parchment paper, giving the icing time to set. (About twenty minutes should do the trick.)
Squeeze a bit of black or brown food coloring into a little bowl and add some water until it is slightly more liquidy. Use a paintbrush to splatter drops of food coloring onto the cookies so they resemble eggs.
Enjoy!
Comments
No Comments